Was this content helpful?
How could we make this article more helpful?
Creating Shortcuts To Shares
Create shortcuts to shares for quick access to your data.
Create shortcuts using the operating system
Windows XP, Vista, and Windows 7:
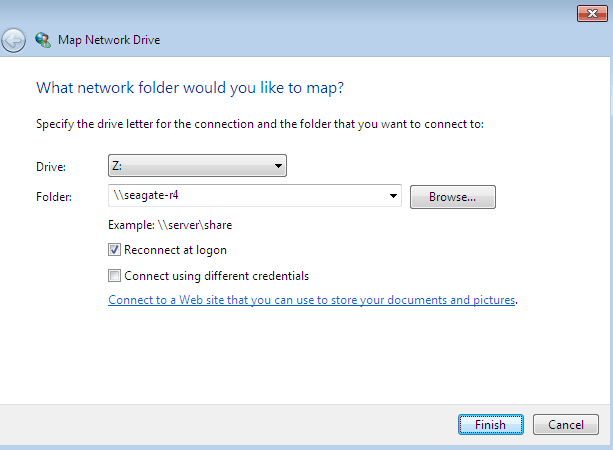
- From an Explorer window in Windows XP, select Tools > Map Network Drive. For Windows Vista and Windows 7, open an Explorer window, navigate to Computer, and choose Map Network Drive.

- Browse to and select the share you wish to auto mount. Make certain that Reconnect at logon is selected.

- Private shares will require the NAS OS user login and password.
- Repeat steps 1-3 for additional shares.
Mac - mount
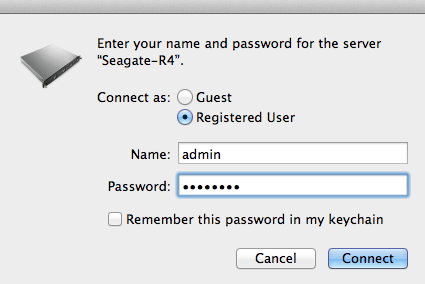
- Open a new Finder window and choose your NAS in SHARED > [machine name]. All public shares will appear. To access private shares, choose Connect As and enter your NAS OS username and password.

- Choose Connect.
Mac - mount at boot
Before following the steps below, make certain to mount the shares as described above.
- From the Apple icon in the menu bar, select System Preferences > Accounts > Login Items.
- Choose the ”+” sign to add a new item to the list and browse for the shares that you mounted.
When you log on to Mac OS, the shares will automatically mount on your desktop. If the shares do not mount on the desktop, open a Finder window and check SHARED. If the shares are available in SHARED but are not visible on the desktop, go to the Finder preferences and change the settings to display connected servers on your desktop.