- An image backup created with DiscWizard can only be restored to the exact same computer on which it was created.
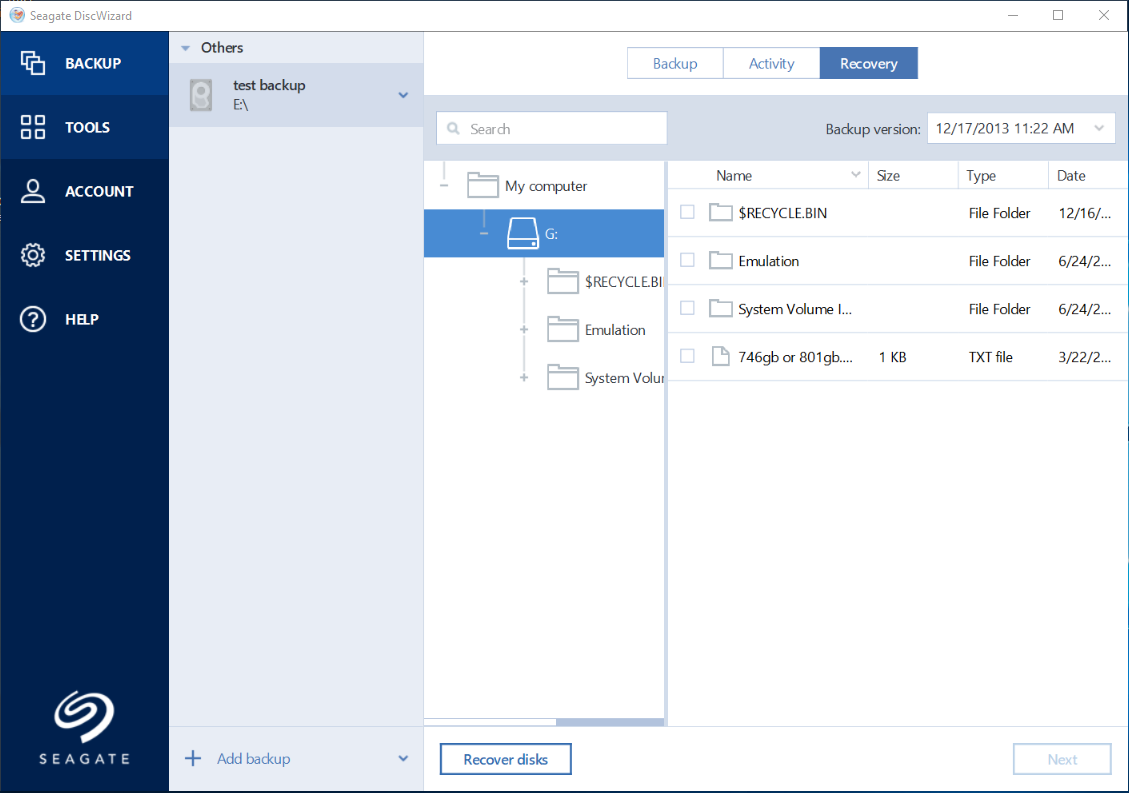
- Open the DiscWizard software and click on the Backup selection.
- Select the backup you want to restore and click on Recovery at the top right of the window.
Note: If you do not see your backup listed here, click the arrow next to Add Backup at the bottom of the window and select Add existing backup.

- The software will display the files that were backed up previously. To do an image restore, select the Recover disks button at the bottom of the window.
- Click on Disks near the top of the window and you will see the drive or drives that you backed up previously. Put a check mark next to the drive or drives you would like to recover, and then choose the destination you would like from the drop-down menu that appears.
- Click on Recover Now at the bottom right of the window to start the restore process. If the destination drive is not empty, a message displays, asking if you are sure it is OK to erase the drive. Click Yes to begin the restore process.
- A status bar will display the progress of the restore.
- A reboot may be required to complete the Image Restore.
- Once the image has been restored, verify that it was successful by booting from the Destination Disk to which it was restored.
*For more information regarding DiscWizard, you can access the built-in help guide through the Help selection on the left side of the software..


