Here you will find instructions to change the drive icon in macOS and Windows.
To proceed, select your operating system:
macOS
Windows
macOS
If you reformat or erase your external hard drive in macOS, the disk icon may change to the generic icon.
| USB Generic Icon | Thunderbolt Generic Icon |
 |
 |
You can change the icon back to the original image as long as you have an .icns file. If you don't have the .icns file you can find it under Drive icon files for macOS section below, otherwise please proceed to the Instructions to change the icon in macOS.
Drive icon files for macOS
Find the drive icon of your device in one of the compressed folders below.
Note: Icon files are sorted by categories and are available as .zip file.
Instructions to change the icon in macOS
Instructions to change the icon in macOS
-
Download the appropriate .zip file and open it to see the contents.
-
Browse to find the desired .icns file and save it to your Desktop.
-
Connect your device and wait for it to mount on the Desktop.
-
Control+click on the device’s icon.
-
Select Get Info.

-
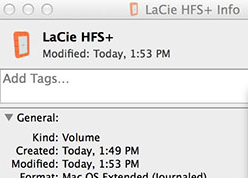
Move the Get Info window to a position that also allows you to see the .icns file downloaded earlier.
-
Drag the .icns file to the icon in the top left corner and release it.

-
The icon will change.

-
If the icon does not change, reboot your computer.
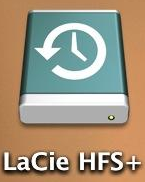
Note about Time Machine: When you select a drive as the Time Machine backup destination, volume will always display the Time Machine icon and cannot be modified. See Time Machine icon below:

Windows
Windows
If you reformat or erase your external hard drive in Windows, the disk icon may change to the generic icon.
|
USB Generic Icon |
|
|
You can change the icon back to the original image as long as you have an .ico file. If you don't have the .ico file you can find it under Drive icon files for Windows section below, otherwise please proceed to the Instructions to change the icon in Windows.
Drive icons files for Windows
If your device is a legacy product you can still find the drive icon in one of the compressed folders below.
Note: Icon files are sorted by brand, by categories and are available as .zip file.
Instructions to change the icon in Windows
Instructions to change the icon in Windows
-
Download the appropriate .zip file and open it to see the contents.
-
Browse to find the desired .ico file and save it to your Desktop.
-
Connect your device and wait for it to appear in Computer/File Explorer.
-
Double-click on the drive to open it.
-
Drag the .ico file to the drive and drop it, to save the file on the drive.
-
If there is a document called Autorun.inf in the drive, right-click and select to Open with Notepad.

-
If no such document exists, launch a Notepad document. A new Notepad document will be displayed.
-
In the Notepad document, create the following text:
[autorun]
icon=.\drivename.ico
Note: “drivename” should be the same name of the .ico file
So, for example, we will consider an icon called OneTouch.ico. The proper text to put into the Notepad document is this:
[autorun]
icon=.\ OneTouch.ico
-
Save the Notepad file as Autorun.inf on the drive whose icon you want to change.
At this point, to review, both of the following files must be saved on the drive whose icon you want to change: -
Autorun.inf
-
The .ico file

-
Safely remove the drive.
-
Wait 30 seconds.
-
Reconnect the drive.
-
The icon should be changed.
-
If the icon does not change, reboot your computer. Disconnect the drive during the reboot and reconnect it once the computer startup process is fully complete.


