Cet article vous a-t-il été utile ?
Comment pourrions-nous l'améliorer ?
Product Features
Lyve Cloud Object Storage provides a full set of features that allows customers to fully utilize the S3 Cloud Object Store in a variety of ways and with many third party applications. The sections below detail various features and functions of the system.
S3 API support
Lyve Cloud Object Storage offers a full range of API access by replicating AWS S3 REST commands and functions as much as possible, allowing you to use applications which have been validated against AWS without issue. See Lyve Cloud Object Storage API User Guide for details of supported REST API commands.
Lyve Cloud console
Most system administrative functions can be performed using the Lyve Cloud console graphical user interface (GUI). The console allows admin and root users to:
- Manage users, policies, and access keys.
- Interact with buckets and manage bucket features and settings.
- View usage statistics for the account.
The features and functions exposed in the GUI are continually being expanded. For basic operational details, see the Lyve Cloud Object Storage Customer Guide.
Console sessions
The console remains active after successful authentication by the user and while interacting with the console. The user is automatically signed out after after a period of inactivity (default timeout is 15 minutes). The timeout setting can be set on a per user basis by selecting the MY ACCOUNT tab, which is accessed using the dropdown menu in the top right corner of the console.
Supported browsers
The console supports the following browsers:
| Browser | Version |
|---|---|
| Google Chrome | Last three versions |
| Mozilla Firefox | Last three versions |
| Microsoft Edge | Last three versions |
| Apple Safari | Last three versions |
Multifactor authentication for GUI
Users can set multifactor authentication (MFA) for their login. This is done on a per user basis through the Lyve Cloud console GUI on the MY ACCOUNT tab. The process supports most third-party authenticator applications.
Set up MFA
If you set up MFA to access the system every time you log in, you must follow the two-step authentication process. The console GUI requests users to enter a one-time password (OTP) generated from an authenticator app. An OTP is a unique password that is only valid for a single login session or transaction.
To set up MFA:
- Log in to the console using your credentials.
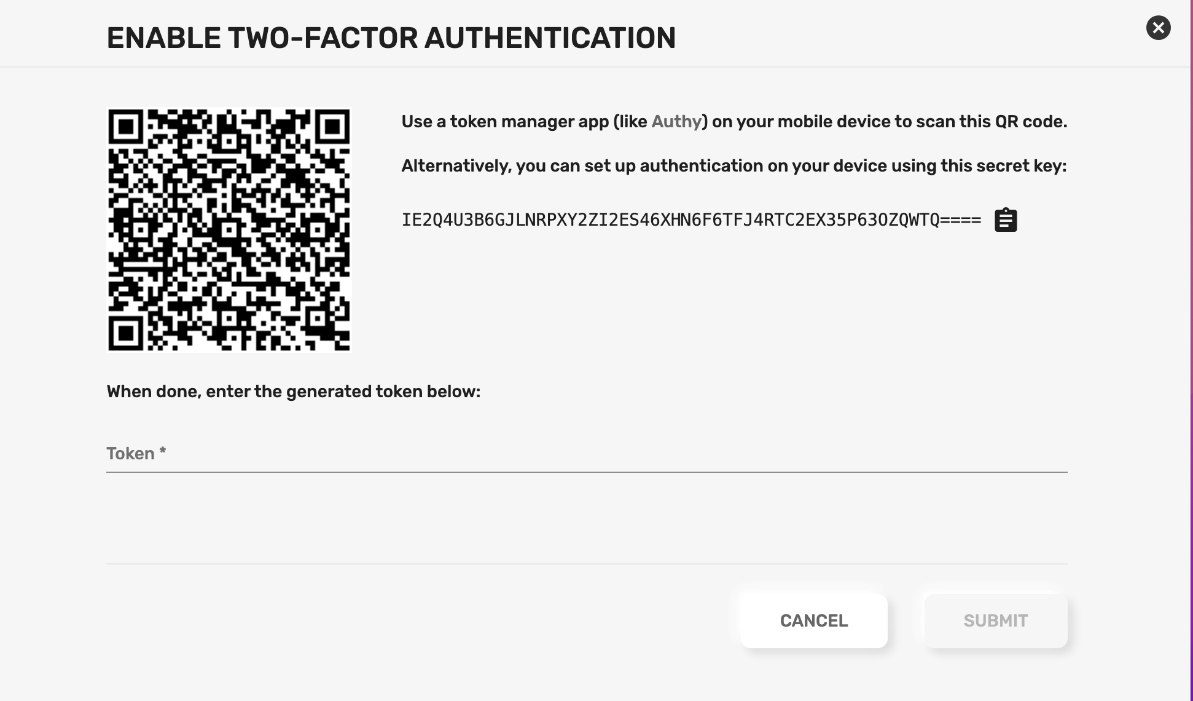
- Use a third-party authenticator app such as Google, Microsoft, or Oracle Mobile Authenticator to generate an OTP. The authenticator app generates a random OTP that expires within a time limit.
- In the console, enter the OTP displayed in the authenticator app.
- Select SUBMIT.
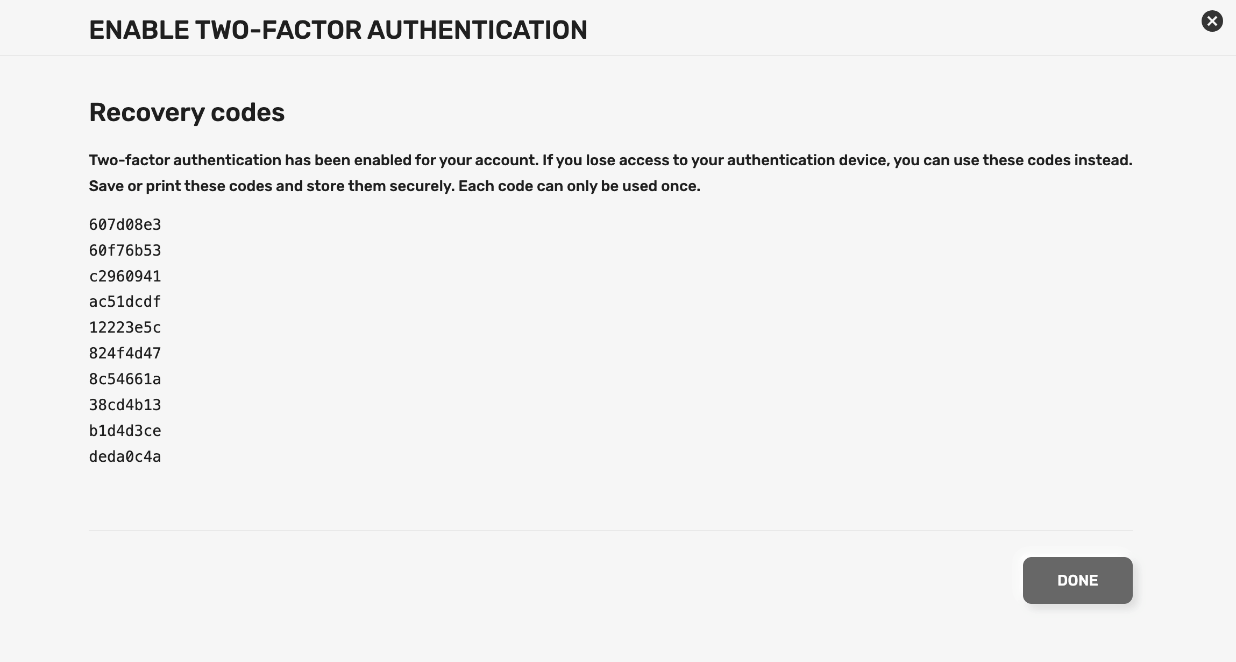
- After MFA has been enabed, Lyve Cloud Object Storage will generate a set of recovery codes. Save or print the recovery codes and store them in a secure location. In the event that you lose your authenticating device, you can use the recovery code to temporarily log in again.
- Select DONE.
Disable MFA
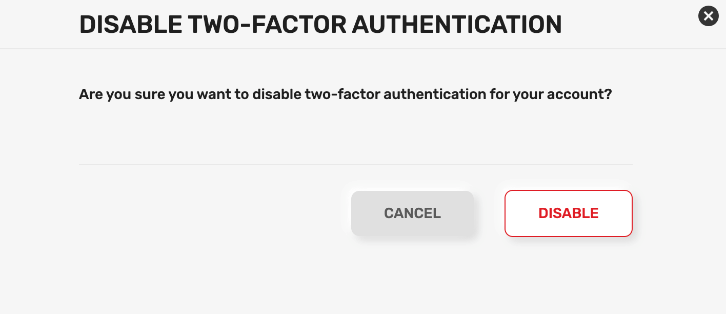
To disable MFA, select the DISABLE button in MY ACCOUNT.
Federated Login
You can configure a federated login system so that users only need to sign in to your organization's domain in order to have direct access to the Lyve Cloud console. To use the Federated Login feature, your organization must have an authentication system which uses the Security Assertion Markup Language (SAML) 2.0 protocol. See Configuring Federated Login for more details on how to enable this feature.
Users and policies for S3 access control
Lyve Cloud Object Storage utilizes many of the standard AWS IAM commands for control of users, policies, buckets, and more, allowing easier integration with third-party storage management systems. For supported IAM REST commands, see the Lyve Cloud Object Storage API User Guide.
Permissions via policies are used to control who can access buckets and which actions they are allowed in a bucket. Bucket permissions are granted by assigning policies to user accounts.
Aside from the root user, each user needs a policy to access buckets and obejcts. Policies are assigned to users, and a user can have multiple policies. Each policy can be created/edited in the Lyve Cloud console using a simple interface for assigning read, list, write, and delete controls to a bucket. Alternatively, you can upload a JSON file with predefined policies. All policy administration can be managed using REST commands in addition to the console.
Use AWS defined policies
The system allows the migration of AWS IAM policies to Lyve Cloud Object Storage, making it simple to start working with service accounts based on existing policies. A policy file uses a JSON file format that is compatible with an AWS IAM policy.
Working with policy files allows you to:
- Specify the Condition element: Query the exact request values to determine when a policy is in effect, or list specific actions such as Action: ["s3:GetObject","s3:PuObject"].
- Specify the Resource element for several buckets and objects.
Get an IAM policy file from AWS
You can manually copy policy permission details from AWS IAM policy to use in the system. This is to replicate an existing AWS policy in the Lyve Object Storage system. To do this use the following steps:
- Log in to AWS Management Console.
- Select Services in the top left corner of the page to view the list of services.
- Select IAM in 'Security, Identity, & Compliance'.
- Under 'Access Management', select Policies and use the search field to find the relevant policy.
- Select the JSON tab. Copy the policy details into a new file, and then save it as a JSON file.
Use a policy permission file
The following table lists elements in the policy permission file and specifies if which are mandatory, optional, or invalid.
| Elements | Mandatory/Optional/Invalid | Description |
|---|---|---|
| Statement | Mandatory | Contains a single statement or an array of individual statements. |
| Resource | Mandatory | Specifies object(s) or bucket(s) that is related to the statement. |
| Effect | Mandatory | Allows or denies access to the resource. |
| Action | Mandatory | Describes specific action(s) that will be allowed or denied. |
| Version | Mandatory | It defines the version of the policy language and specifies the language syntax rules that are to be used to process a policy file. |
| Condition | Optional | Allows you to specify conditions when a policy is in effect. The Condition element includes expressions that match the condition keys and values in the policy file against keys and values in the request. Specifying invalid condition keys returns an error. For more information, see Known Issues. |
| Sid | Optional | A statement ID. The statement ID must be unique when assigned to statements in the statement array. This value is used as sub ID for policy document's ID. |
| Id | Optional | A policy identifier, such as UUID (GUID). |
| Principal | Invalid | Specifies the service account that is allowed or denied to access a resource. |
| NotPrincipal | Invalid | The service accounts that are not specified, are allowed or denied access to the resource. |
| NotAction | Invalid | Specifies that it matches everything except the specified list of actions. If this element is part of the permission file, you need to replace it with the Action element. |
| NotResource | Invalid | Specifies that it matches every resource except the available specified list. If this element is part of the permission file, you need to replace it with the resource element. |
Example of policy permission file
In the following example, the policy permission has three statements:
- Statement1: Allows object listing with a prefix David in the bucket mybucket. It is done using a Condition element.
- Statement2: Allows read and write operations for objects with the prefix David in bucket mybucket.
- Statement3: Denies delete object operation for two resources:
- All the objects in mybucket/David/*
- All the objects in mycorporatebucket/share/marketing/*
{
    "Version": "2012-10-17",
    "Statement": [
        {
            "Sid": "statement1",
            "Action": ["s3:ListBucket"],
            "Effect": "Allow",
            "Resource": ["arn:aws:s3:::mybucket"],
            "Condition": {
                "StringLike": {
                    "s3:prefix": ["David/*"]
                }
            }
        },
        {
            "Sid": "statement2",
            "Action": [
                "s3:GetObject",
                "s3:PutObject"
            ],
            "Effect": "Allow",
            "Resource": ["arn:aws:s3:::mybucket/David/*"]
        },
        {
            "Sid": "statement3",
            "Action": ["s3:DeleteObject"],
            "Effect": "Deny",
            "Resource": [
                "arn:aws:s3:::mybucket/David/*",
                "arn:aws:s3:::mycorporatebucket/share/marketing/*"
            ]
        }
    ]
}
The following policy limits bucket access to specific IP addresses:
{
    "Version": "2012-10-17",
    "Statement": [
        {
            "Sid": "Sid-1",
            "Action": ["s3:*"],
            "Effect": "Deny",
            "Resource": ["arn:aws:s3:::mybucket"],
            "Condition": {
                "NotIpAddress": {
                    "aws:SourceIp": ["134.204.220.36/32"]
                }
            }
        },
        {
            "Sid": "Sid-2",
            "Action": [
                "s3:*"
            ],
            "Effect": "Allow",
            "Resource": [
                "arn:aws:s3:::mybucket",
                "arn:aws:s3:::mybucket/*"
            ]
        }
    ]
}
Create a policy with the JSON file
To set a policy permission with the JSON file you just created:
- In the top menu, select Policies.
- On the Policies page, select the button on the left side of the page to create a new policy.
- In the 'Create Policy Permission' dialog, enter a name.
- Select Upload JSON file and then select the file.
- Select Submit.
User accounts
User accounts associate keys with policies in the system. Keys obtain the policies and role permissions of the user account for which they're created. You must have at least one user account to create keys.
Each account is assigned one of three roles in the system:
| Role | Account level permissions | Bucket level permissions | Comments |
|---|---|---|---|
| Root | Can perform changes on account level settings as well as other users and policies | This user has access to all buckets | The account owner. This user can not be deleted or changed. |
| Admin | Can perform changes on account level settings as well as other users and policies. Can perform any REST operations supported in the account. | Policies must be attached for it to have access to buckets and objects. | The level of account is for administration functions in the account. |
| Sub-user | Not allowed to perform account level actions or make changes to users or policies. Limited account level REST operations allowed. | Policies must be attached for it to have access to buckets and objects. | Typically used for applications to access buckets and use the system. |
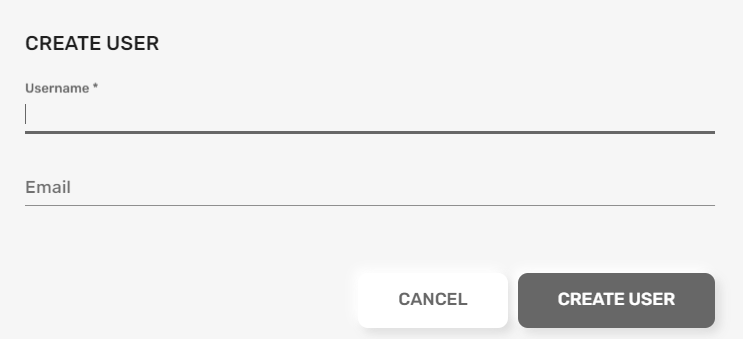
To create a user:
- Select the User tab on the top menu.
- On the User page, select the button on the right side of the screen.
- In the dialog, enter a username and an email address for the account.
- Select CREATE USER.
Note the following items when creating/using users accounts:
- The root user is defined at account creation and cannot be changed.
- Each user can have multiple access keys and policies associated with it.
- All the values for username and the email must be entered in lower case.
- The username and the email address can be the same value. This is a simple method of creating users accounts who can also access the Lyve Cloud console.
- The email address is optional. However, if omitted, the account cannot be used to access the console. This type of user is typically created for application access where account access keys will be used for access to data.
- A welcome email message is sent to the user to set up their password when provisioned (if they have an email address).
- By default, accounts are created in a sub-user role. You can modify a created account to give it the admin role.
- The root role user can reset the password of any account in the system and generate keys for them. They can also modify any policy and assign those to any user.
- Any admin user can reset the password of any admin or sub-user account in the system and generate keys for them. They can also:
- Modify any policy and assign it to any user.
- Create lifecycle policies.
- A sub-user role user can only generate access keys and reset their own password. They can not modify policies or policy assignments.
Access keys
Access for third-party applications is provided with access keys. Keys do not expire but can be deleted using the Lyve Cloud console or S3 commands. This allows for manual rotation of keys as needed.
A key is associated to a specific user and uses the policies and role they are assigned for the permission settings.
In the console, access keys are shown in the user account, accessible via the Users page or at the top right under MY ACCOUNT:
- Use the button to generate new keys.
- View the access key value of existing keys.
IP access security
Lyve Cloud console and S3 REST command interactions use Transport Layer Security (TLS) for data in-flight: TLS 1.2+ (AES-256-GCM). This level of protection is also is used for all network traffic internal to the cloud object store.
See IP source control below.
Data at Rest Encryption (DARE)
Data at Rest Encryption (DARE) a process that encrypts data stored on physical media so that it can only be accessed by those with a key. SSE-S3 level of data storage and encryption is provided by Seagate, who manages the keys by default for all buckets. The system will accept explicit SSE-S3 encryption requests correctly in the REST API for storage, but will not change the default behavior of the system.
Lyve Cloud Object Storage also supports encryption with a client-provided key (provided as part of S3 request headers), commonly known as SSE-C. This uses keys provided by the client for data encryption. The system does not store or retain the keys used in these cases, so the client needs provide the same keys for data access or the data will not be accessible.
Multiple region/sites
Lyve Cloud Object Storage offers multiple regions/sites for data storage in the US, Europe, and Asia. Access to specific regions needs to be granted to your account to create buckets in them.
If you need access to locations which are not shown in your account, contact Lyve Support at lyve.support@seagate.com.
Inter-site geographical data replication
When creating a bucket, you can configure it to be automatically replicated on two or more regions/sites. Data is automatically saved and duplicated separately in each location. Each copy of the bucket is active and can be interacted with separately—there is no master/slave configuration, all copies of the bucket are live and active in this system.
The different regions/sites communicate constantly to ensure that a change in one location is almost instantly (usually within 1 second) known and available in all locations.
Inter-site data replication allows customers in different geographic location to access the same bucket while interacting with ‘local’ copies of the data. This removes the need for long distance connections to remote data sets and increases data availability—if one site is not accessible (for whatever reason), requests can be directed to another site to access the data.
There is no additional cost for this feature other than the cost for storage in each location.
Presigned URL
Lyve Cloud Object Storage lets you create pre-signed URLs for objects for both GET and POST operations. The REST API fully supports all functionality for generating pre-signed links.
You can also create a pre-signed link by selecting a specific object in the Lyve Cloud console, and then selecting the Generate pre-signed link action.
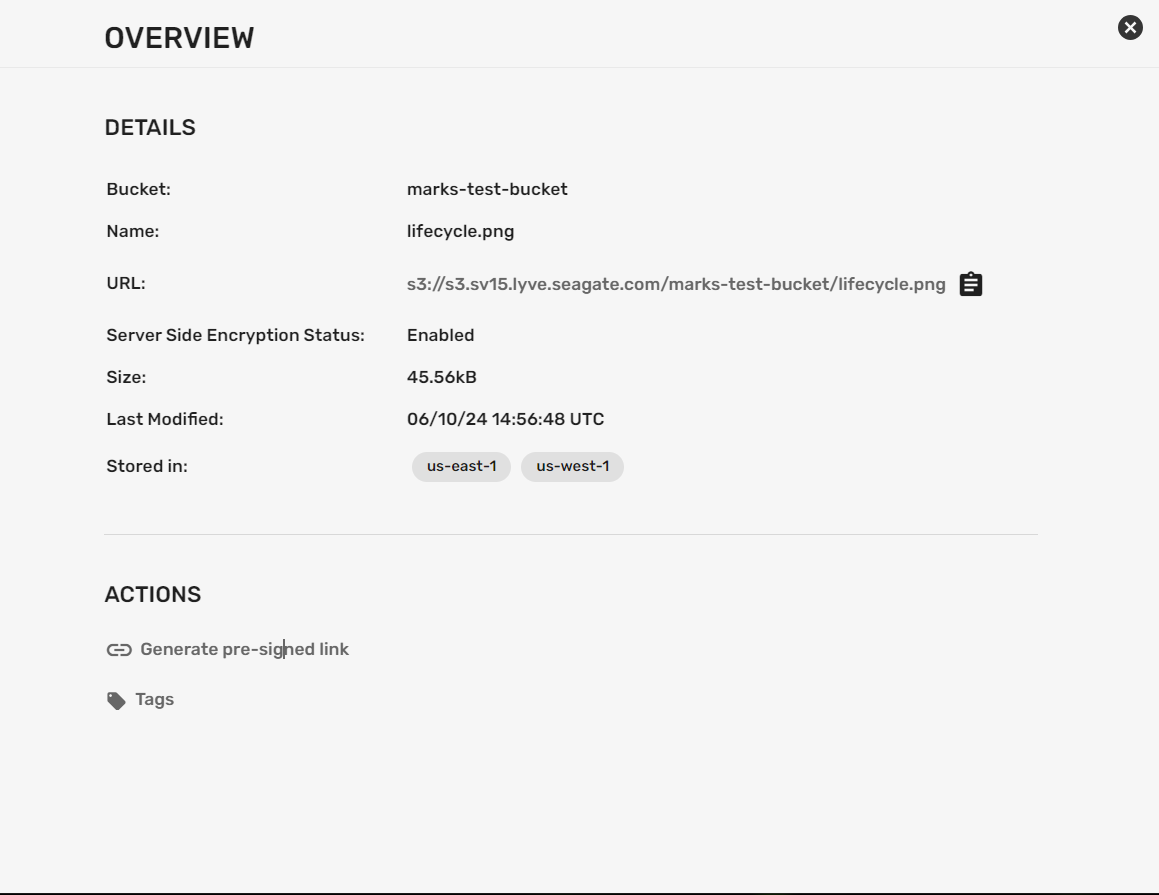
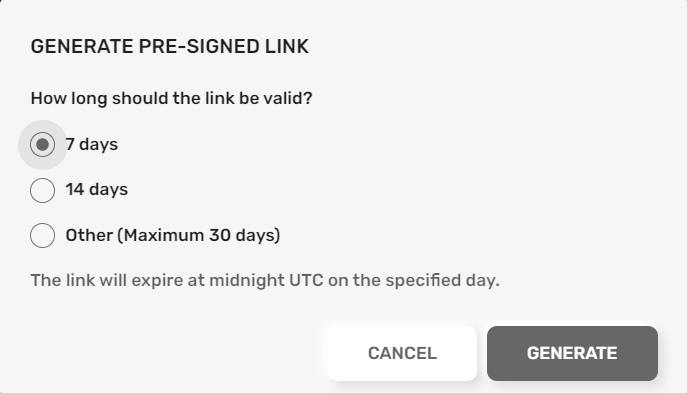
In the dialog, specify how long the link will be valid for:, and then select GENERATE:
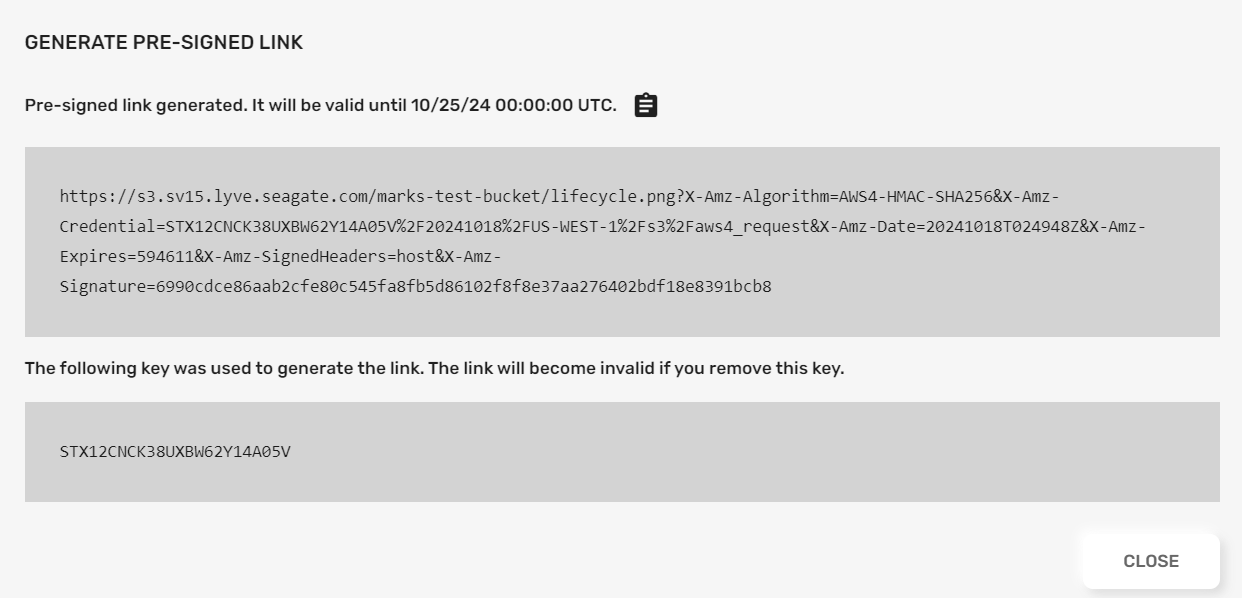
A summary displays detailed information on the generated link.
Object tags
Tags let you store extra data items related to objects. The system supports up to 10 custom tags on each object. These are accessed and controlled via standard S3 API calls, but can also be viewed via the Lyve Cloud console.
Tags can also be seen in the console by selecting the SHOW DETAILS button on an object, and then selecting the Tags link:

You can:
- View and edit key/value pairs for existing object tags.
- Select ADD TAG to add a new tag (limit 10 per object).
- Select the Delete icon to remove a tag.

Object versioning
Object versioning provides protection from data loss. Versioning allows you to save multiple variants of an object in the same bucket. You can then preserve, retrieve, and restore any version of an object that was was in the bucket. Versioning enables the recovery of objects due to unintended user actions or accidental application failures.
In a bucket with versioning enabled, Lyve Cloud Object Store automatically creates and stores an object version whenever:
- A new object is uploaded
- An existing object is overwritten
- An object is deleted
For example, when you delete an object in a versioned bucket, the object isn't removed from the bucket—instead, 'deleted' is just the current version of the object, while the previous object is now just an older version of itself. In short, when versioning is enabled, all operations on existing objects are really just a history of changes.
Versioning has to be set when creating a bucket. In the Lyve Cloud console, enabling versioning is a simple radio button.

In a create bucket REST operation, versioning is a parameter.
The downside of versioning is that buckets will grow in size as object histories grow. 'Deleting' an object will in fact increase the storage used, not reduce it. There are specific ways to delete the old versions of the object using the 'version_id' parameter in the request to identify the specific version of the object to be removed. Applications which support versioned buckets (such as the Lyve Cloud console) will offer this option when handling versioned buckets.
Some applications, including the Lyve Cloud console, let you manage and control old versions of objects. You can also use the lifecycle logic to automatically control the length of time that version records will be retained in a versioned bucket.
WORM controls
When creating a bucket it can be set to be a Write-Once Read Many (WORM) bucket, often referred to as object locking. WORM means that data can be written to the bucket and accessed, but is not allowed to be deleted. If this option is set, then versioning is always automatically enabled for a bucket. WORM can be set using the Lyve Cloud console or via REST API calls.
WORM prevents objects from being deleted or overwritten in a bucket by any user or application. WORM can be set for a specified retention duration using the bucket retention policies detailed below. This functionality is especially useful when you want to meet regulatory data requirements, or other scenarios where it is imperative that data cannot be changed or deleted. This feature should be used when you are certain that you do not want anyone, including an administrator, to delete the objects during their retention duration.
Bucket retention policies can be added to the object-lock setting, but are not required. Some applications (especially backup systems) want to control that themselves, and so enabling this level is all that is required for them as they will set the retention rules on a per object level in the bucket.
Implementation for WORM is done at the software level and must be specified when the bucket is created. It is not possible to change this setting after bucket creation.
Bucket retention policies
If WORM is enabled, you can configure the system to add restrictions for how long an object must be retained in the bucket. Retention policies can be set during bucket creation and to some level can be modified afterwards.
The duration for immutability (that is, the inability to delete) can be specified in days at the bucket level. You can set this value at the object level if required – which some applications do. When you set the duration, objects at the bucket level will remain locked and cannot be overwritten or deleted until that time period as passed. Setting the duration applies to individual object versions, and different versions of a single object can have different durations .
When you place an object in the bucket, the system calculates the retention duration for an object version by adding the specified duration to the object version's creation timestamp. The calculated date is stored in the object's metadata and protects the object version until the retention duration ends. When retention duration ends for an object, you can retain or manually delete an object.
The system supports both compliance and governance modes of data storage as defined by the AWS S3 system. In either case, the retention period is specified in days.
Lifecycle logic support
The Lifecycle logic helps you control the costs of storage of objects and allow you to effectively control the lifecycle by being able to delete expired objects on your behalf. To manage the lifecycle of your objects, you create a create a lifecycle policy for buckets.
An S3 Lifecycle configuration supports the following functions at this time:
| Trim previous versions of Objects | You set the limit for the age of old versions of objects to be removed. The system then automatically deletes object versions which are older than the specified time in an automated manner. This allows for easy control of versioned buckets without manual interactions. It's easy to provides a ‘safety net’ to avoid overwrites/deletes (by mistake or otherwise) of data objects without the risk of unlimited storage growth in a versioned bucket. |
| WORM/Lock object data deletion clean up | This allows for trimming data automatically after it is not needed when it is stored in WORM buckets. The system cannot override/delete any data objects which the retention rules protect in the bucket. However, specifying deletion rules with a longer time than the retention policy provides a simple method of cleaning up unwanted objects after a retention period has expired. |
| Archive data deletion | This allows for trimming data automatically after it is not needed any more. The system will delete objects in a bucket which have been there for a longer period than the defined period. This provides a simple method of cleaning up unwanted old objects. |
| Clean up unwanted data/buckets | Sometimes there is a need is to delete a bucket which contains a large number of objects. Doing this manually if there are millions of objects is a long and tedious task. The lifecycle policies can be used for mass deletions of data while reducing effort. |
| Multi-part cleanup | If you use a lot of large, mutli-part PUT operations over poor network connections, this can leave a lot of partially uploaded objects. These are eventually cleaned up but increase the cost of storage as all the failed uploads are kept by the system to allow for recovery and restart of the operation. A lifecycle policy can be used to delete the failed multi-part objects before the system does this. This then reduces the costs of storing such failed objects. |
At present control for and commands for lifecycle logic are supported though the S3 REST commands.
S3 audit/bucket logs
Server access logging provides detailed records for the requests that are made to a bucket. Logs are useful for many reasons, such as security and usage checks. By default, the system does not provide access logs—you must explicitly enable this feature. When you enable bucket logging, the system will write all the actions on the monitored bucket to a destination that you choose. This provides a log of every action which occurs in a bucket.
Bucket logging is set up on the main bucket screen of the Lyve Cloud console via a button on the bucket summary line. This allows control of where the logs are generated, and their naming as shown below.
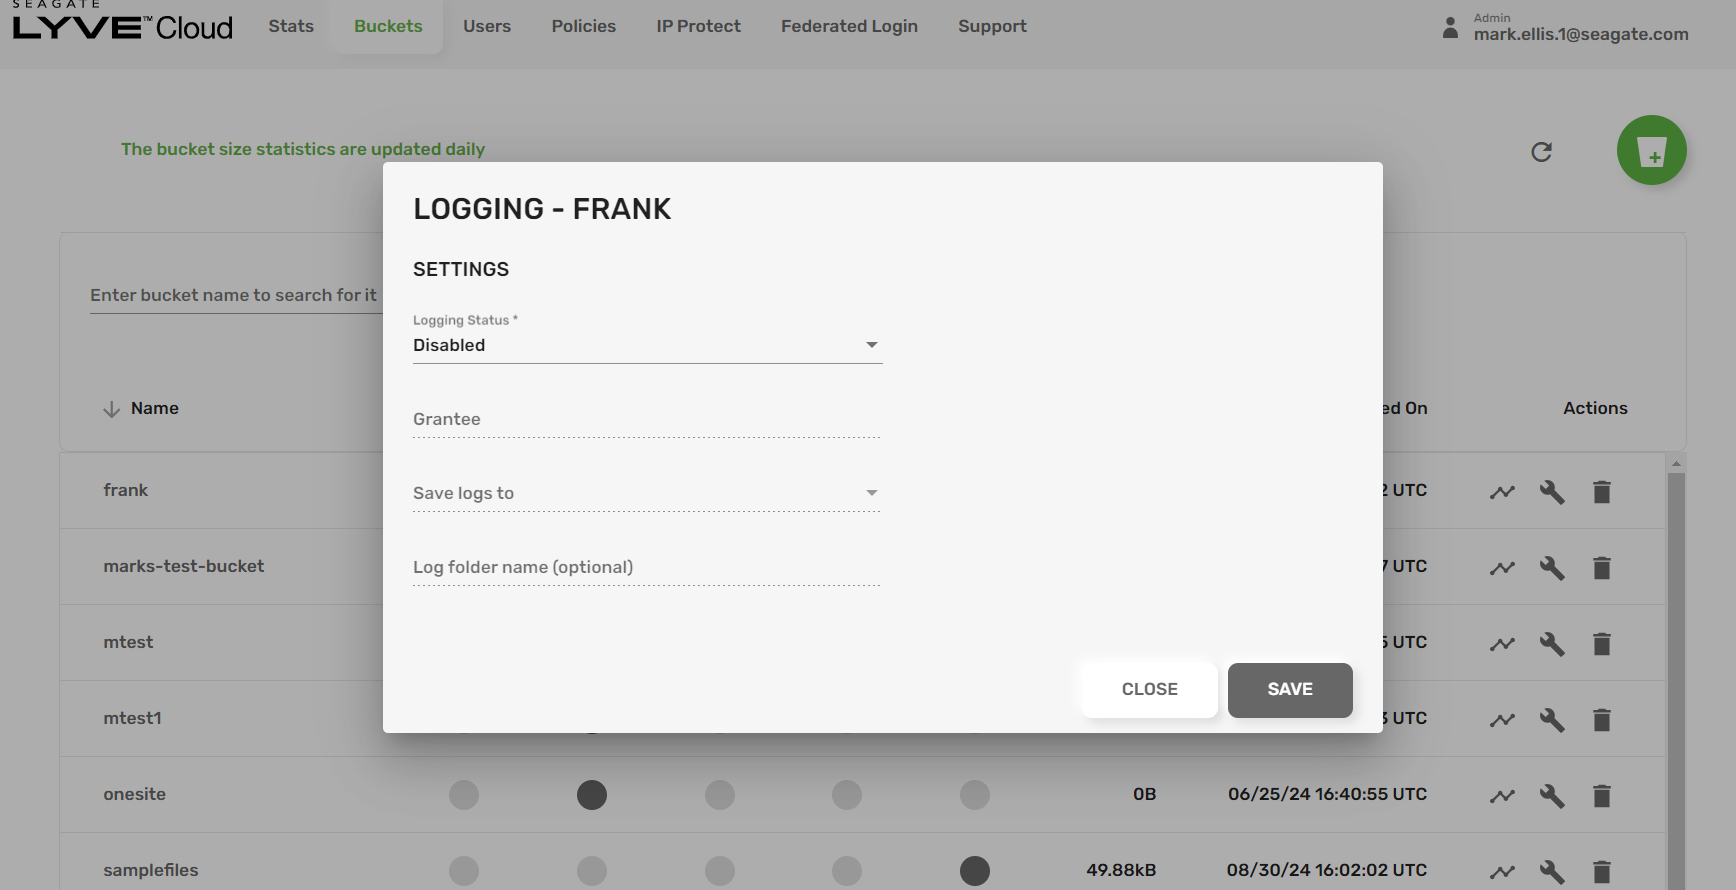
The following items should be noted around the bucket logging functionality:
- Bucket logs are written periodically by the system. The logging is not instant—it can take some time for a log to be written. Each log will likely contain multiple events from over a time-period. The frequency of log file creation, and time period which a log file covers, may change depending on multiple factors, including the number of events occurring and system processes generally.
- Bucket logging is done on a ‘best effort’ basis. All possible actions are taken to ensure the logs are complete—however, in some circumstances, it's possible that bucket logs may not be a complete record of every event which occurs on a bucket. It's also possible that duplicate records may be created in the logs. Although log records are rarely lost or duplicated, you should be aware that bucket logging is not guaranteed to be a complete accounting of all requests.
- It's strongly advised that you avoid writing bucket logs to the monitored bucket itself. This will generate an infinite loop of events and will likely be counterproductive for any analysis of the traffic in the bucket. It also increases storage costs for the logs.
- Bucket logging will generate extra storage in the account, which will be charged at the normal rates.
Bucket log object names are generated in the following format:
bucket_logging_<endpoint>_<account>_<bucket>_<year>_<month>_<day>_<hour>_<minute>_<seconds>.<milliseconds>
The date/time is when the object was created.
The bucket logs events are in the following format:
0QTV8D9VN4P3N4CPV4HX24F2XZ mtest [08/Nov/2024:15:42:29 +0000] "134.204.180.68" "STX07YT7MIZNIDQHHQV49OSS" "ee3d7cc8fdfa3c0e69ac2df2a9ae99d8" s3:GetBucketVersioning "" "GET /mtest?versioning" "200" "-" "0" "0" 11 "0" "https://console.sv15.lyve.seagate.com/" "Mozilla/5.0 (Windows NT 10.0; Win64; x64) AppleWebKit/537.36 (KHTML, like Gecko) Chrome/130.0.0.0 Safari/537.36" "-" - SigV4 SSL AuthHeader - "-" 0QTV8D9VN4P3N4CPV4HX24F2XZ mtest [08/Nov/2024:15:42:29 +0000] "134.204.180.68" "STX07YT7MIZNIDQHHQV49OSS" "6db6f3490bfeb4262ba30f7978a06dfd" s3:GetBucketLogging "" "GET /mtest?logging" "200" "-" "0" "0" 6 "0" "https://console.sv15.lyve.seagate.com/" "Mozilla/5.0 (Windows NT 10.0; Win64; x64) AppleWebKit/537.36 (KHTML, like Gecko) Chrome/130.0.0.0 Safari/537.36" "-" - SigV4 SSL AuthHeader - "-"
The following table lists the descriptions of fields used in the sample log message above:
| Field | Description | Example (from sample log above) |
|---|---|---|
| Bucket owner | An ID of the bucket that stores the object being copied. This is an internal reference item and included to ensure that the bucket log format matches the AWS format of bucket logs. | 0QTV8D9VN4P3N4CPV4HX24F2XZ |
| Bucket | The name of the bucket that stores the object that's being copied. | mtest |
| Time | The time at which the request was received. These dates and times are in Coordinated Universal Time (UTC). The format, using strftime() terminology, is [%d/%B/%Y:%H:%M:%S %z]. | [08/Nov/2024:15:42:29 +0000] |
| Remote IP | The apparent IP address of the requester. Intermediate proxies and firewalls might obscure the actual IP address of the machine that's making the request. | "134.204.180.68" |
| Requester | The access key ID of the requester, or a hyphen - for unauthenticated requests. | "STX07YT7MIZNIDQHHQV49OSS" |
| Request ID | A string generated by the system to uniquely identify each request. | "ee3d7cc8fdfa3c0e69ac2df2a9ae99d8" |
| Operations | The operation which was requested to be performed. | s3:GetBucketVersioning |
| Key | The key (object name) of the object being copied, or "" if the operation doesn't take a key parameter. | "" |
| Request-URI | The Request-URI part of the HTTP request message. In sample log: "GET /mtest?versioning". | "GET /mtest?versioning" |
| HTTP status | The numeric HTTP status code of the GET portion of the copy operation. Example: 200. | 200 |
| Error code | The S3 Error code of the GET portion of the copy operation, or "" if no error occurred. | "" |
| Bytes sent | The number of response bytes sent, excluding the HTTP protocol overhead. This can be 0. | 0 |
| Object size | The total size of the object in question. This can be 0. | 0 |
| Total time | The number of milliseconds that the request was in flight from the server's perspective. This value is measured from the time that your request is received to the time that the last byte of the response is sent. Measurements made from the client's perspective might be longer because of network latency. | 11 |
| Turn-around time | The number of milliseconds that the system spent processing your request. This value is measured from the time that the last byte of your request was received until the time that the first byte of the response was sent. The value can be 0 if the response was instantly actioned. | 0 |
| Referrer | The value of the HTTP Referrer header, if present. HTTP user-agents (for example, browsers) typically set this header to the URL of the linking or embedding page when making a request. | "https://console.sv15.lyve.seagate.com/" |
| User-agent | The value of the HTTP User-Agent header. | "Mozilla/5.0 (Windows NT 10.0; Win64; x64) AppleWebKit/537.36 (KHTML, like Gecko) Chrome/130.0.0.0 Safari/537.36" |
| Version Id | The version ID of the object being copied, or "-" if the x-amz-copy-source header didn't specify a version or that is not relevant for the operation being performed. | "-" |
| Host Id | The S3 extended request ID, if valid. | - |
| Signature version | The signature version, SigV2 or SigV4, that was used to authenticate the request, or - for unauthenticated requests. | SigV4 |
| Cipher suite | The Secure Sockets Layer (SSL) cipher that was negotiated for an HTTPS request, or - for HTTP. | SSL |
| Authentication type | The endpoint that was used to connect to Lyve object cloud. If it is from an internal system, the value will be -. | - |
| Host header | The time at which the request was received. These dates and times are in Coordinated Universal Time (UTC). The format, using strftime() terminology, is [%d/%B/%Y:%H:%M:%S %z]. | [08/Nov/2024:15:42:29 +0000] |
| TLS version | The Transport Layer Security (TLS) version negotiated by the client. The value is one of following: TLSv1.1, TLSv1.2, TLSv1.3, or "" if TLS wasn't used. | "" |
IP source control
Lyve Cloud Object Storage provides a way of limiting the IP connections to an account (to both the console and S3 REST calls). By default, the system allows access from any IP range – which is the equivalent of having a default setting 0.0.0.0/0 mask setting.
IP source control can be set using custom API REST calls or the Lyve Cloud console, for example:
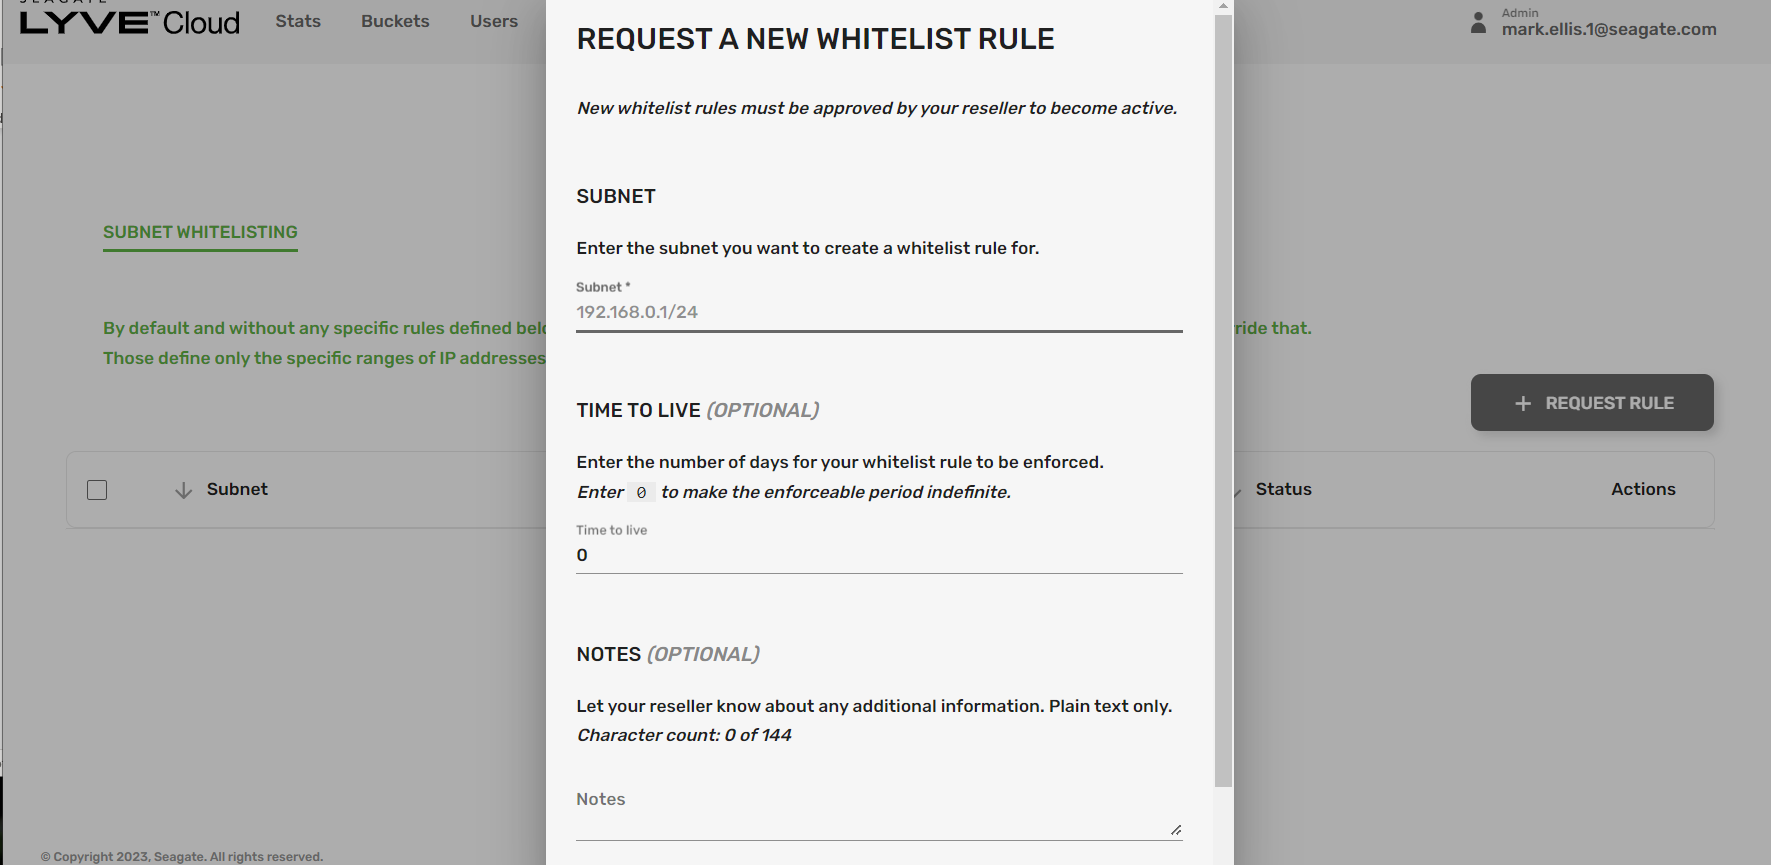
If any IP masks are specified in the console's IP Protect page or through S3 REST calls, these will limit access to those source IP’s. Multiple rule sets are allowed, and traffic is allowed if the IP source address matches any one of the allowed subnet masks. So, when a rule is specified then those override the default value. Any standard IP V4 mask is allowed, and the system support an unlimited number of sub-net masks.
If a mistake is made and you lock yourself out of your own account, contact your reseller or Seagate support to help restore service.
CORS support
Cross-origin resource sharing (CORS) defines a way for client web applications that are loaded in one domain to interact with resources in a different domain. With CORS support, you can build rich client-side web applications which use our S3 solution for data storage and selectively allow cross-origin access to your resources.
The system supports CORS, which is defined by AWS. CORS support is configured via the S3 commands or via the bucket settings in the Lyve Cloud console (see below). All the standard CORS policies and controls are supported at this tme.

Storage Class support
If you have purchased Infrequent Access storage (see the Seagate sales team for details), the system supports the Storage Class settings of STANDARD and STANDARD_IA. Setting the Storage Class to STANDARD_IA tells Lyve Cloud Object Storage that this object is less likely to be accessed in the future. By default, objects are set to STANDARD level.
The Storage Class of an object is defined upon creation. When adding the object via the object creation REST command, you can set the Storage class to STORAGE_IA by adding the x-amc-storage-class: STANDARD_IA parameter. To change the setting of an existing object, you must recreate the object with the new Storage Class value, using either a PUT or COPY command. The Storage Class for existing objects can be seen on a list of the object.
Setting the Storage class to STANDARD_IA allows the system to mange the storage of the object differently. However, all features and functions are available for those objects. They are still accessible via the standard means. The number and frequency of interactions with objects at the STANDARD_IA level may be more restricted by the service.