- ASEAN (English)
- Australia/New Zealand (English)
- Belgique (Français)
- België (Nederlands)
- Brasil (Português)
- Canada (English)
- Canada (Français)
- Deutschland (Deutsch)
- España (Español)
- France (Français)
- India (English)
- Indonesia (Indonesian)
- Italia (Italiano)
- Latinoamérica (Español)
- Middle East/North Africa (English)
- Nederland (Nederlands)
- Polska (Polski)
- Portugal (Português)
- Singapore (English)
- Türkiye (Türkçe)
- United Kingdom (English)
- United States (English)
- 中国 (简体中文)
- 台灣 (繁體中文)
- 日本 (日本語)
- 대한민국 (한국어)
- Início /
- Lyve Cloud S3 Storage Resources /
- Lyve Cloud with LucidLink
Esse conteúdo foi útil?
Como poderíamos tornar este artigo mais útil?
- Partner Solutions
- Lyve Cloud with CloudBoost
- Lyve Cloud with Dell Networker Data Domain
- Lyve Cloud with Rubrik
- Lyve Cloud with IBM Spectrum Protect
- Lyve Cloud with Cohesity
- Lyve Cloud with Commvault
- Lyve Cloud with Veritas NetBackup Media Server Deduplication (MSDP)
- Lyve Cloud with Veeam Backup and Replication
- Lyve Cloud with LucidLink
- Lyve Cloud with BorgBackup
- Lyve Cloud with Acronis
- Data Security Overview
- Data Migration Overview
- Data Migration with Cloudsfer
- Data Migration with Flexify.IO
- Data Migration with Movebot
- Data Migration with Rclone
- Data Migration with StorageDNA Fabric
- How to Create a Pre-Signed URL
- Using SSE-C to Encrypt Objects
- Video Library
- Lyve Cloud with Veritas Backup Exec
- Lyve Cloud with NAKIVO Backup and Replication
- Lyve Cloud with IBM Aspera HSTS Server and Desktop
- Lyve Cloud with Starfish
Lyve Cloud with LucidLink
In this section, you will learn how to configure Lyve Cloud to LucidLink.
Prerequisites
- A Lyve Cloud Storage Account
- Permission with All Operations
- Install the LucidLink client application
Configuration overview
The Lyve Cloud configuration with LucidLink is divided into three simple tasks:
- Create a Lyve Cloud Service Account. For more information, see Provisioning Storage Buckets.
- Create a filespace domain in LucidLink.
- Initialize your filespace to connect with your Lyve Cloud storage account.
Create a LucidLink Filespace Domain to Lyve Cloud
To create a Lucidlink filespace domain:
- Register and create an account to access LucidLink on LucidLink.com.
- Login and create your Domain name.
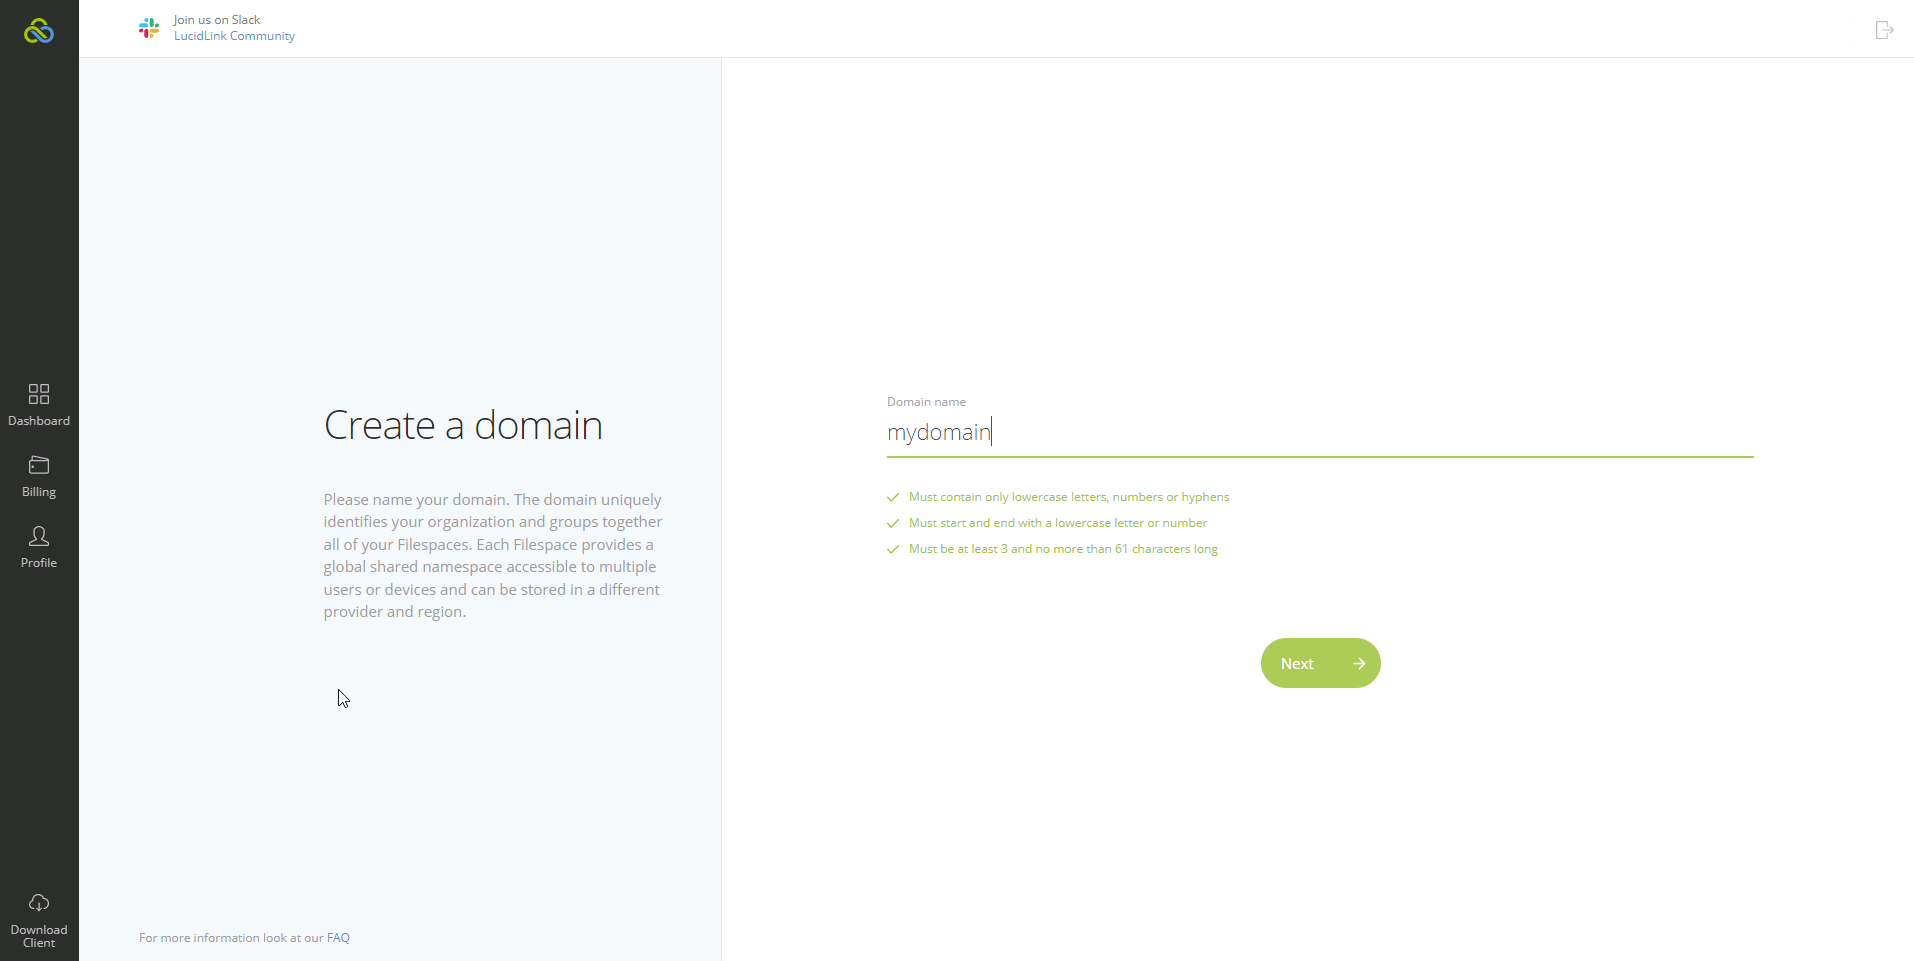
- Select Create a new Filespace, from the domain dashboard.
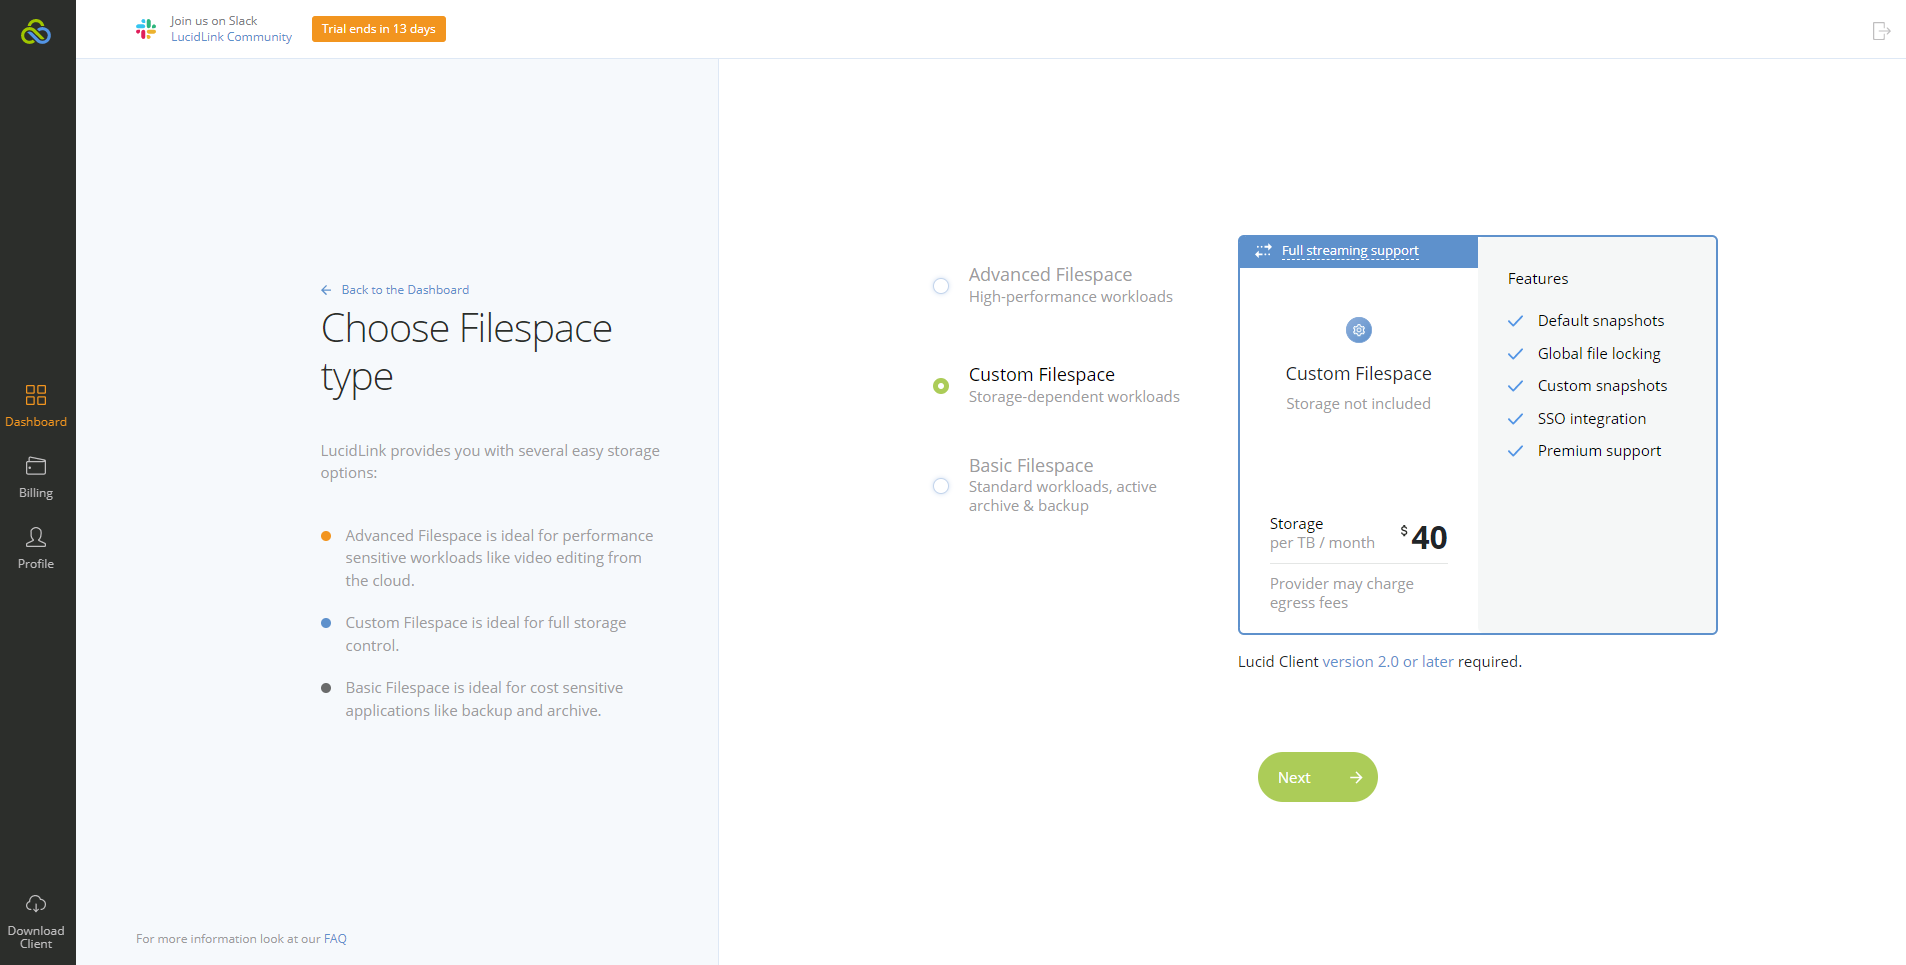
- Choose Custom Filespace for storage-dependent workloads and select Next.
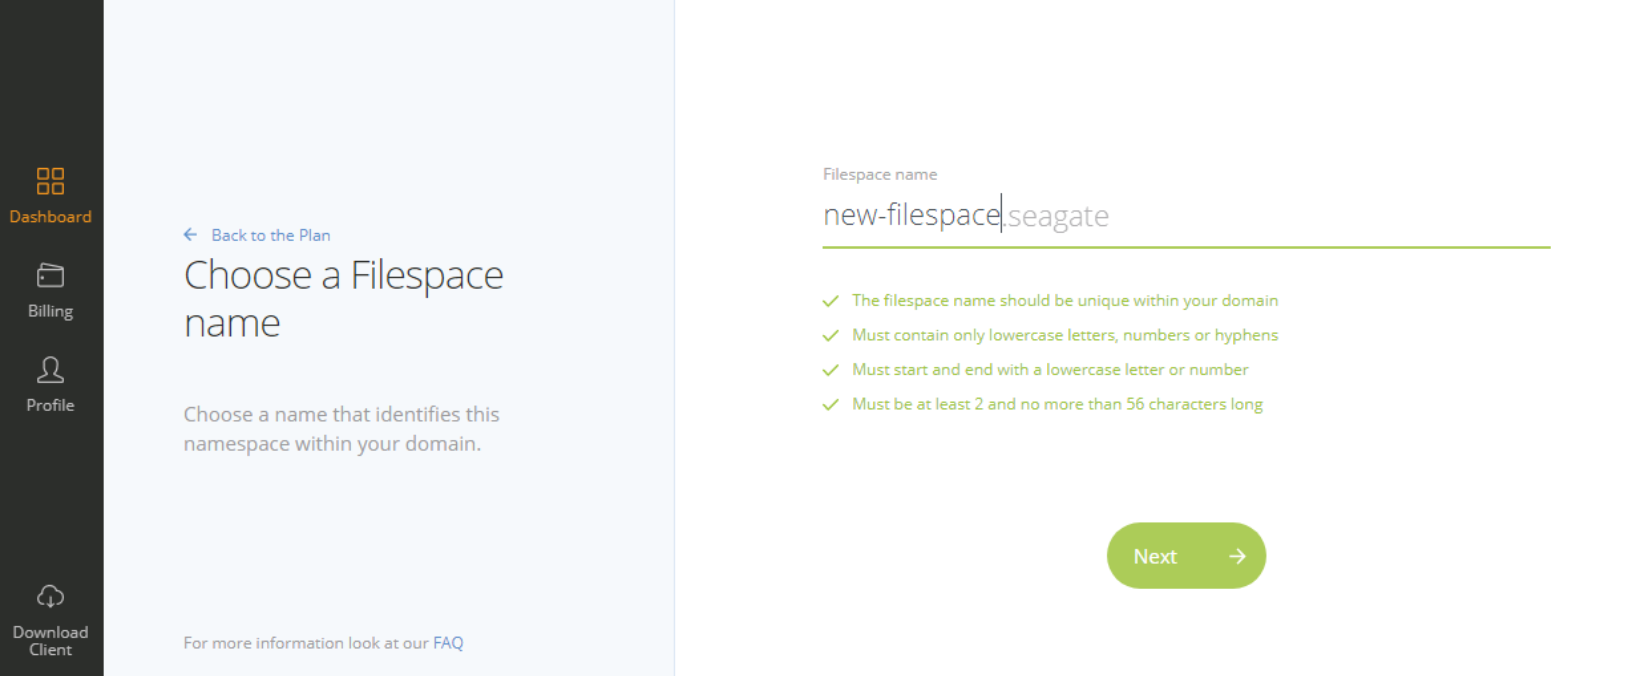
- Enter the name of your Filespace and select Next. The name of the Filespace must be unique.
- Select Other Cloud to connect to Lyve Cloud.

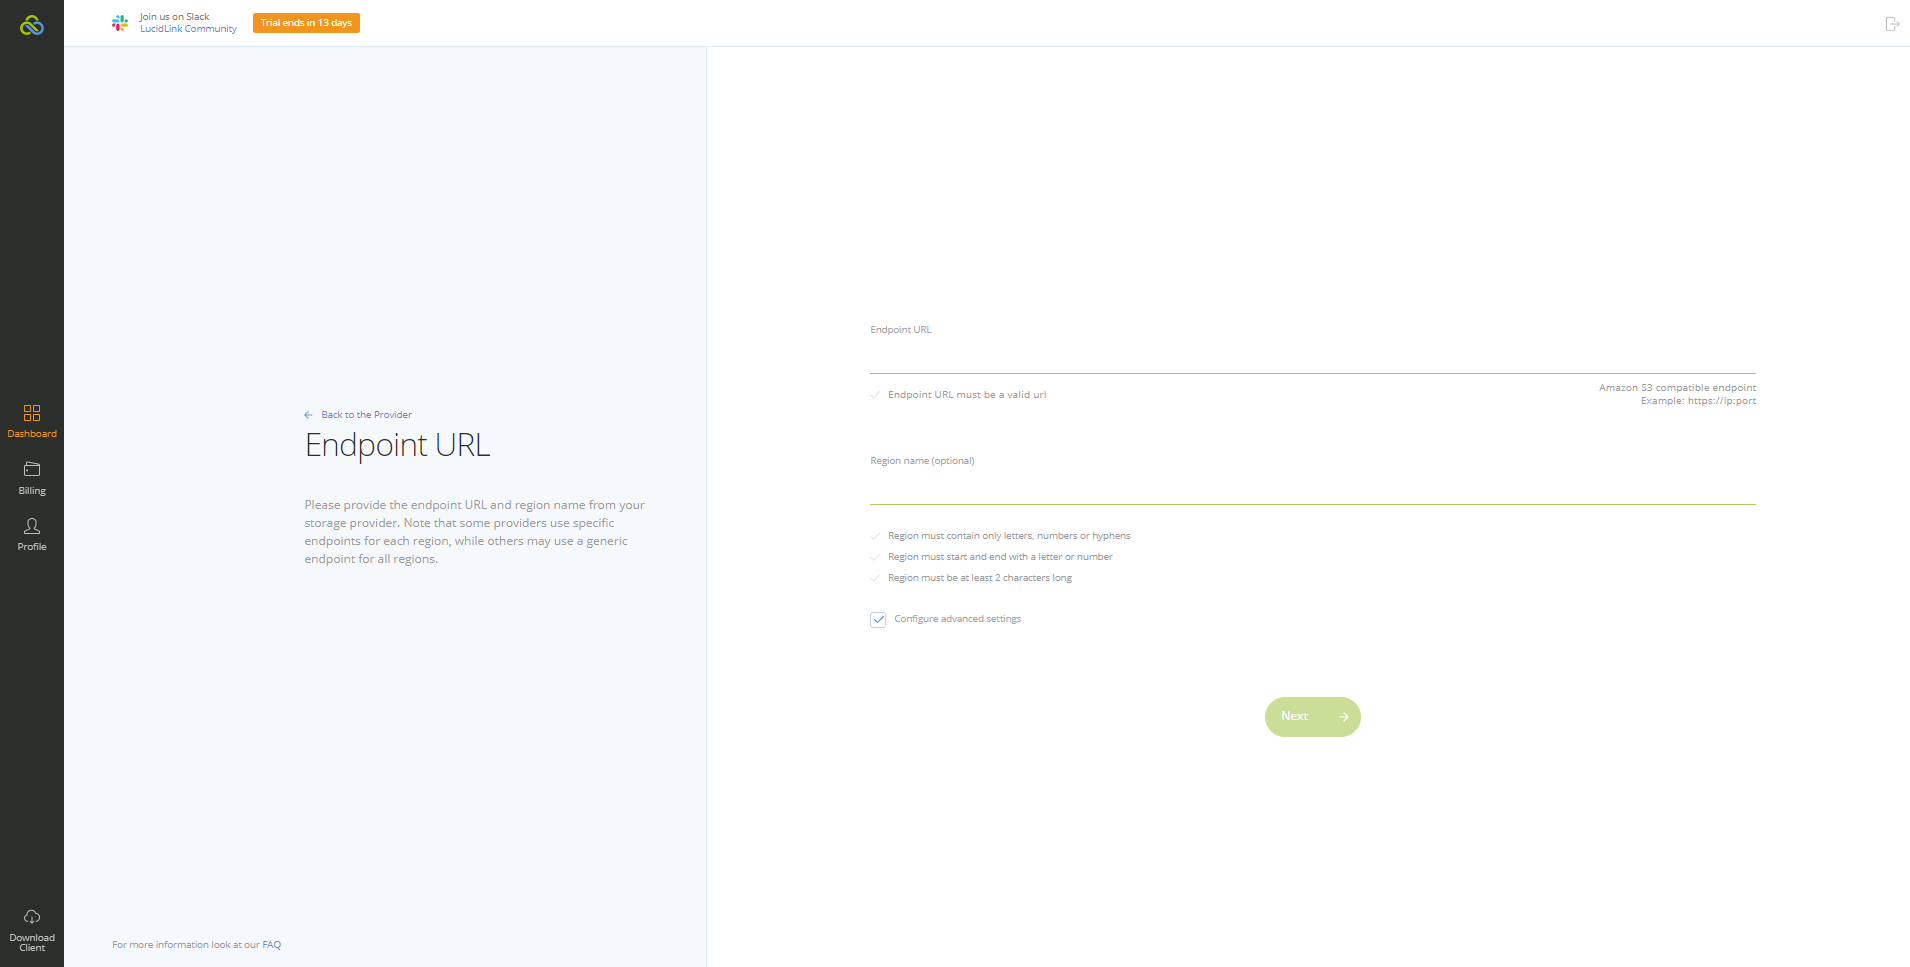
- Enter the Lyve Cloud Endpoint URL and Region name for the bucket, and then select configure advanced settings and Next to complete.
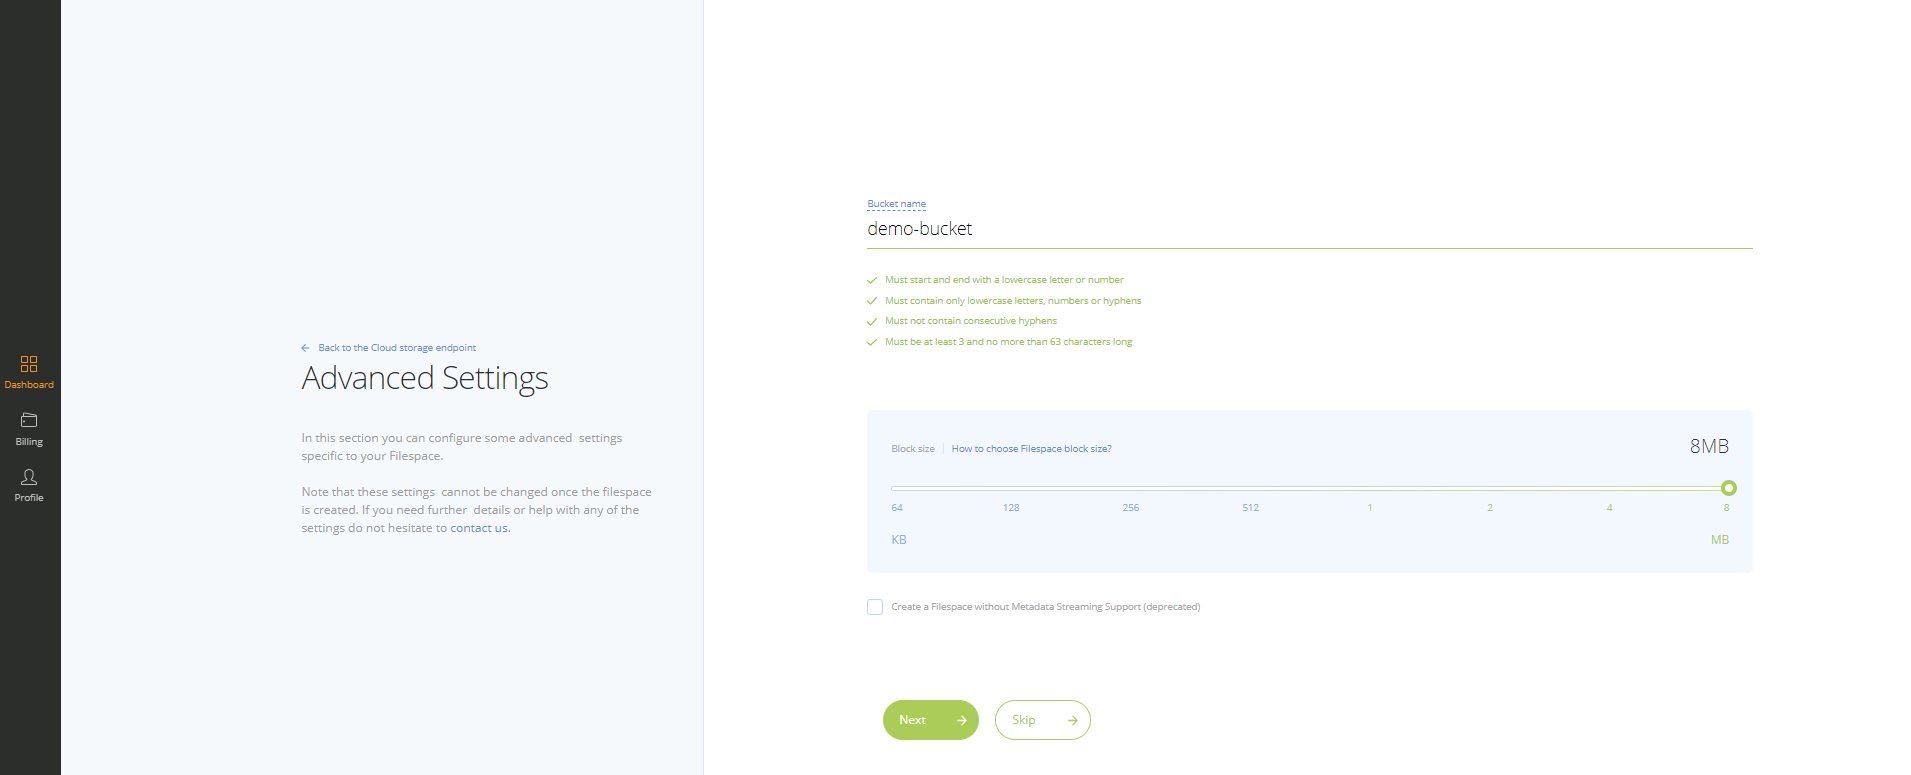
- In the Advanced Settings, enter your Bucket name and select the block size to allow uploading data to Lyve Cloud in chunks. We suggest a block size of 8 MB. Select Next.
- Review the details and edit the fields if required, and select Create.

- From your filespace dashboard, select Initialize to connect the Filespace with your bucket configuration to the local system.
Connecting LucidLink to Lyve Cloud
To connect Lucidlink to Lyve Cloud:
- Download the LucidLink Client Application (see Prerequisites above). Once installed, navigate to the Initialize a filespace menu and select Launch the Lucidlink desktop client.

- Enter the Lyve Cloud Access and Secret keys on the Add your cloud credentials page.

- Set root credentials and select Initialize.
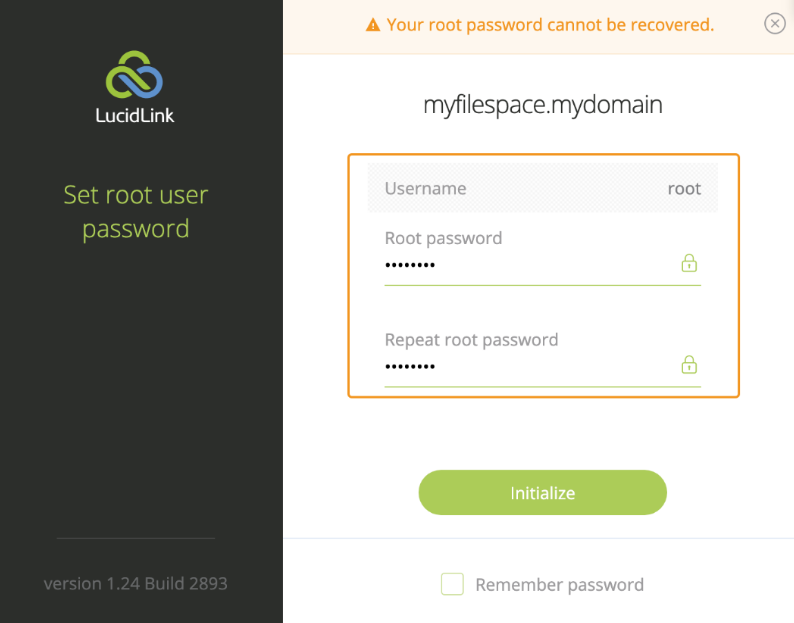
- Once initialized, the disk space name Lucid(L): is available on your local system. You can upload data of any size into the Lucid(L) disk, allowing the data to upload to the cloud in the block size. The block size is assigned in Advanced settings.
Connecting to the filespace from another machine
To connect the filespace from another machine:
- Launch the LucidLink client application and select Connect to another Filespace to connect to the filespace on another machine.

If a filespace is already connected to the machine and you want to switch the user or filespace, right-click and select Switch user or filespace, and then select Connect to another filespace.

- Enter the filespace name in filespace.domain format. Once completed, follow the steps in Connecting LucidLink to Lyve Cloud above to initialize the filespace.
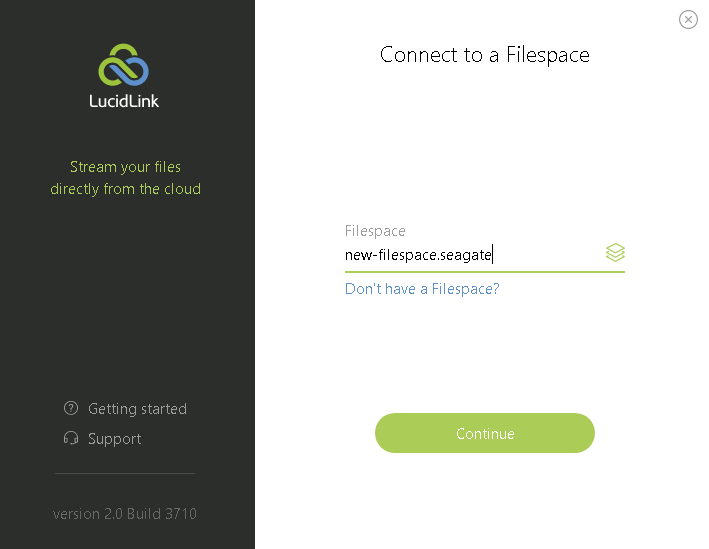
- Enter the root password set while initializing the filespace.
Lyve Cloud S3 Storage Resources Guide