此内容对您有帮助吗?
如何使本文更有帮助?
Lyve Cloud with Veritas NetBackup Media Server Deduplication (MSDP)
This section guides you on deploying Lyve Cloud as a new cloud tier to an existing Veritas NetBackup Media Server Deduplication Pool (MSDP) storage server.
Prerequisites
- A Lyve Cloud Storage Account:
- Permission with All Operations
- Service Account credential for the storage account.
- RHEL/CentOS 7.3+ Media server/ OR NetBackup Appliance.
- NBU 8.3 (NBU Appliance 3.3.0.1) or higher with MSDP set up. For more information, see How to set up MSDP server.
- Confirm the MSDP server has 1TB of unused space on the storage pool.
- Download the latest NetBackup CloudProvider.xml.
Configuration overview
The configuration for Lyve Cloud with NetBackup has the following tasks:
- Configure Lyve Cloud Storage Account. For more information, see Provisioning storage buckets
- Add a cloud tier to NetBackup by completing the following steps:
- Configuring an MSDP storage server
- Adding cloud buckets as volumes
- Creating storage units
Configure an MSDP storage server
To configure the storage server on Veritas NetBackup:
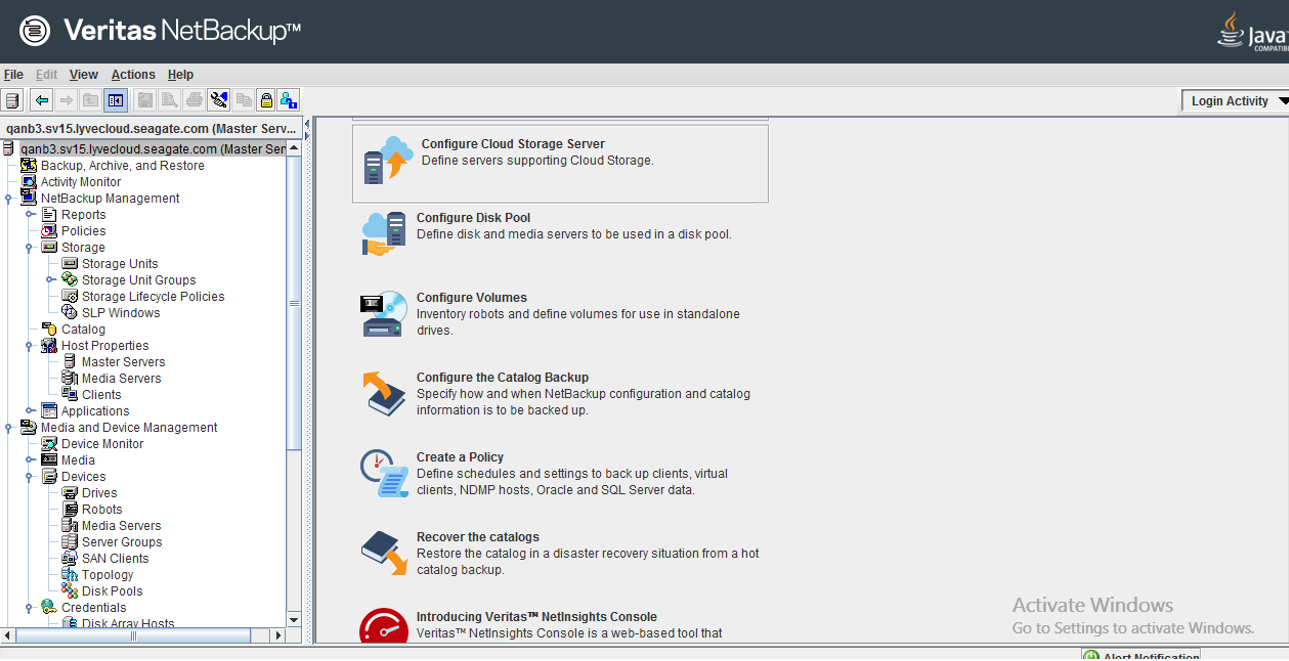
- Login to the Veritas NetBackup Java Console application and select Configure Cloud Storage Server.
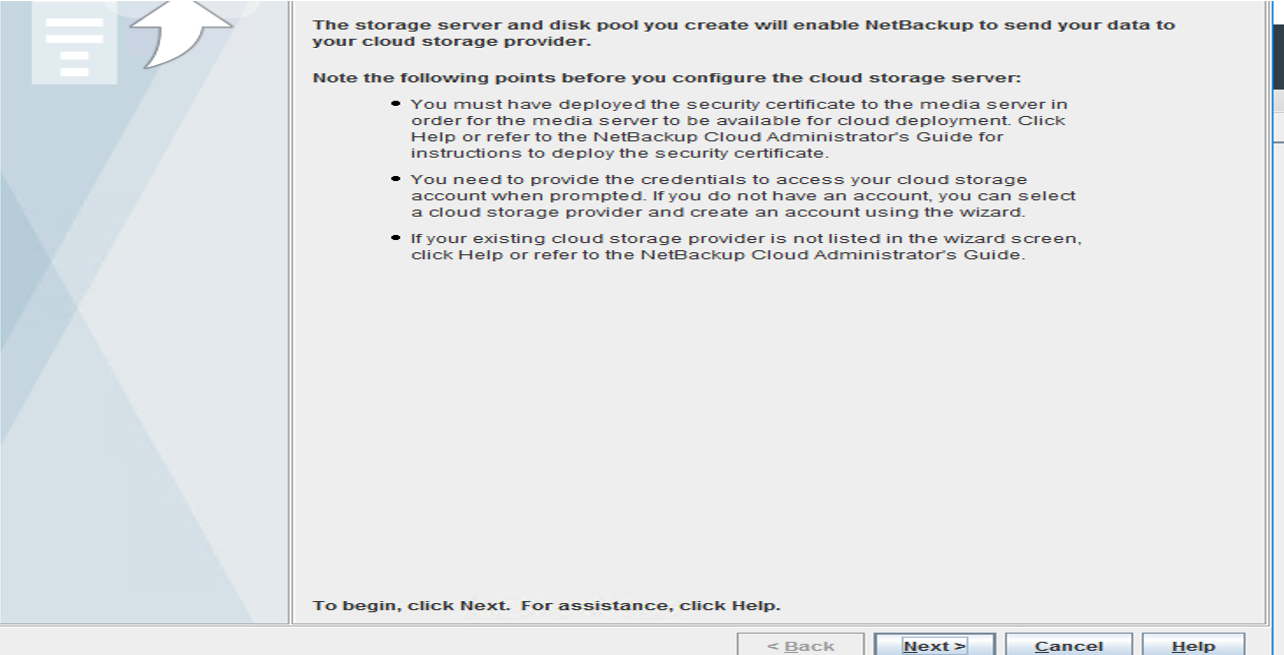
- Select Next to create a cloud storage server and disk pool.
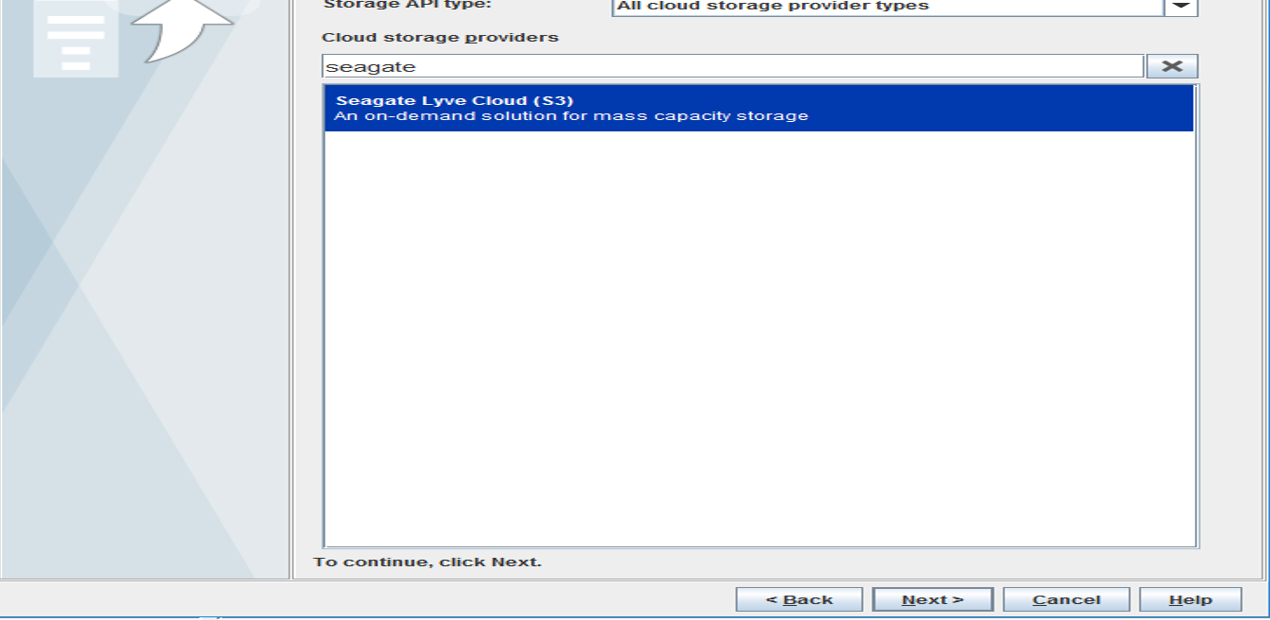
- Select Seagate Lyve Cloud (S3) as your cloud storage provider. Select Next to continue.
- Enter the field information:
- Service Host: Enter your Lyve Cloud bucket endpoint URL.
- Storage server name: Enter the Storage server name.
- Media server name: Enter your Media server name.

- Select Add Cloud Storage and provide the following information in the General settings tab.
- Service host: Enter your Lyve Cloud bucket endpoint URL
- Service endpoint: Enter your Lyve Cloud bucket endpoint URL (same as Service host)
- HTTP port: Enter the HTTP port as 80
- HTTPS port: Enter the HTTPS port as 443
- Storage server name: Enter the storage server name
- Endpoint access style:Select as Path Style from the list.

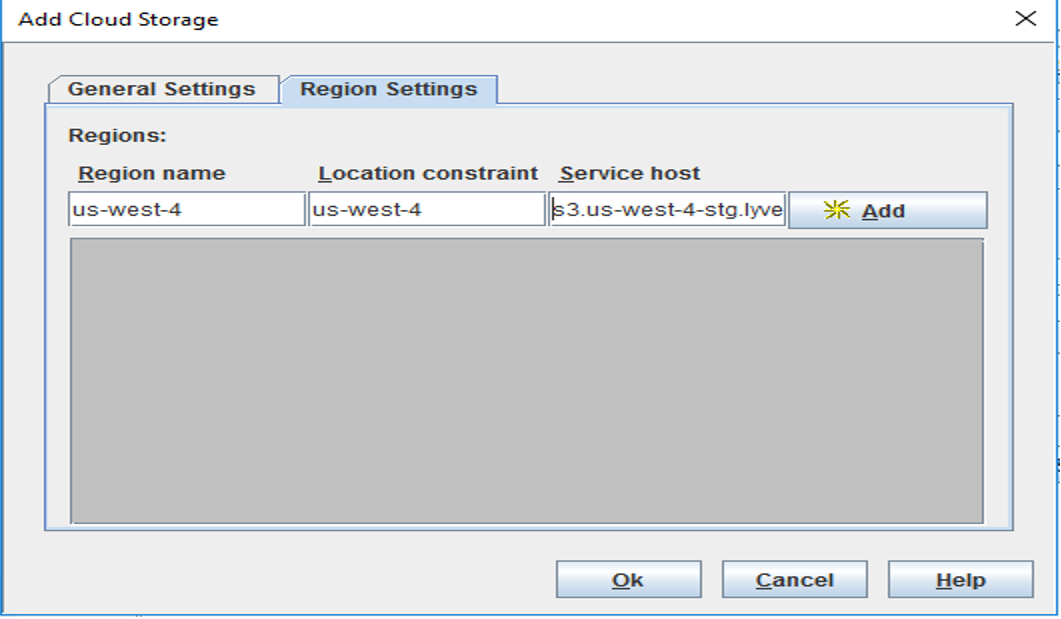
- Select Region Settings and enter the following information:
- Region name
- Location constraint (same as Region name)
- Service host
Select Add, and then Select Ok to proceed.
- Select the Media server and enter the Access key ID and Secret access key of your Lyve Cloud bucket.

- Select Advanced Settings and perform the following and then select Ok to proceed:
- Check Use SSL
- Select Data Transfer
- Deselect Check Certificate Revocation
Select Ok to proceed.

- Keep the default Object Size, Compression, and Encryption. Select Next to proceed.
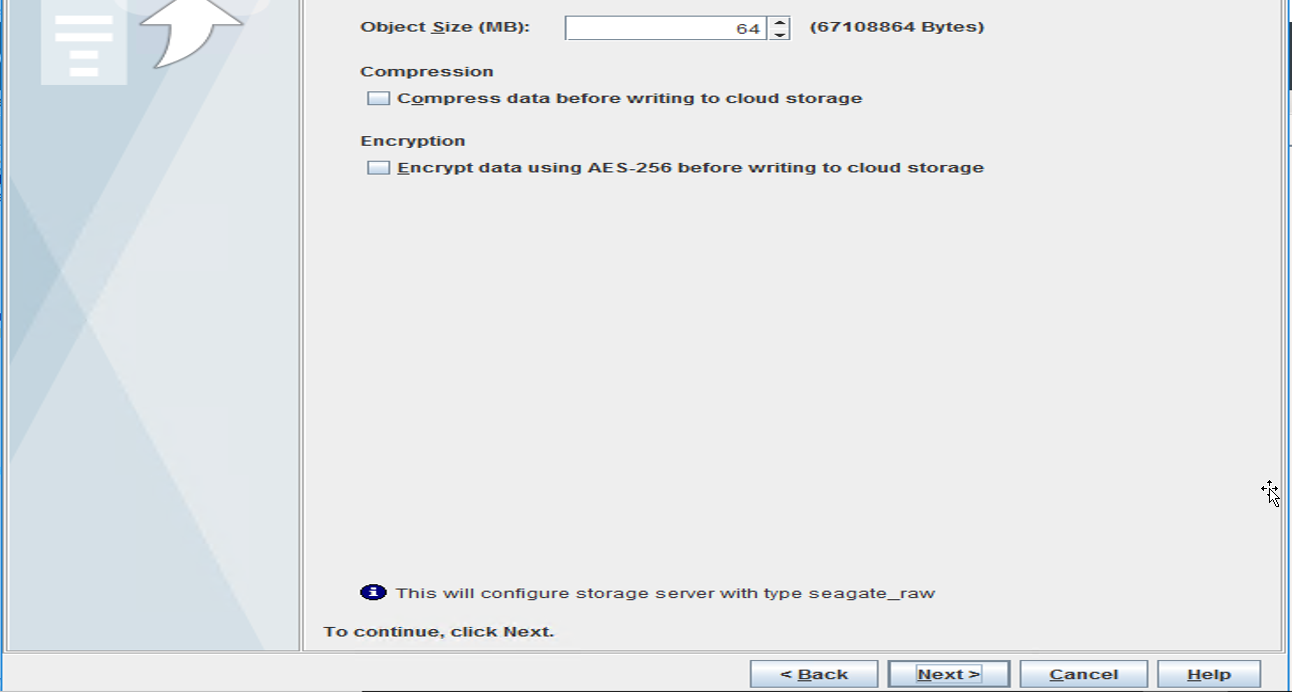
- Select Yes to proceed without compression and encryption settings.

- Review the storage server summary and select Next.
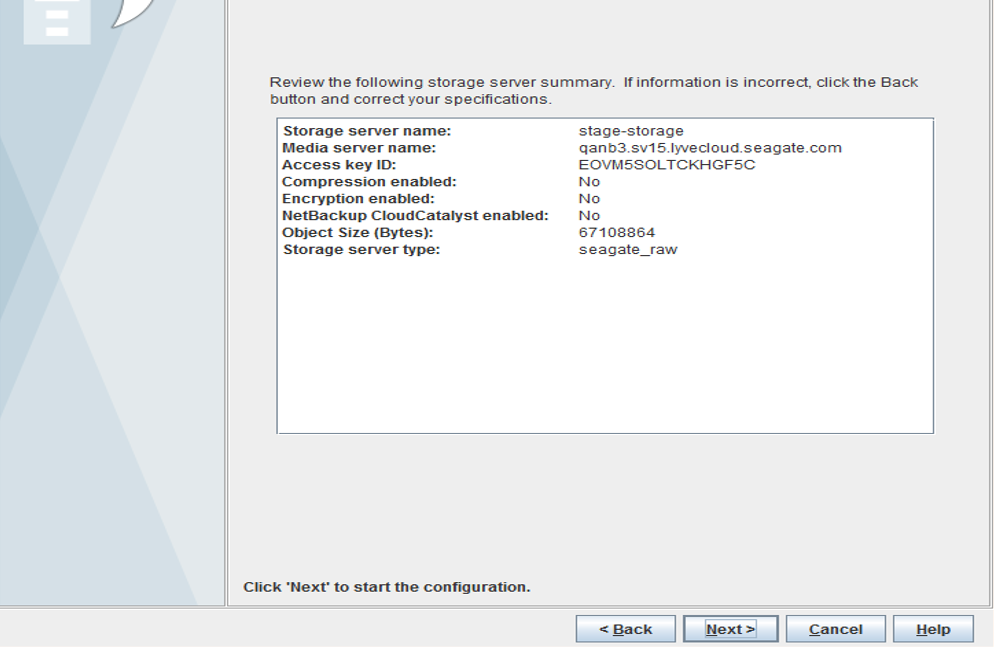
- View the status of the server tasks and select Next to continue.

- If performed correctly, the message will appear as shown below. Select Next to configure your Disk pool.

Add cloud buckets as volumes
To add a cloud bucket:
- Choose your bucket(s) as your backup destination. Alternatively, you can select Add New Volume to create a new backup destination. Select Next to continue.
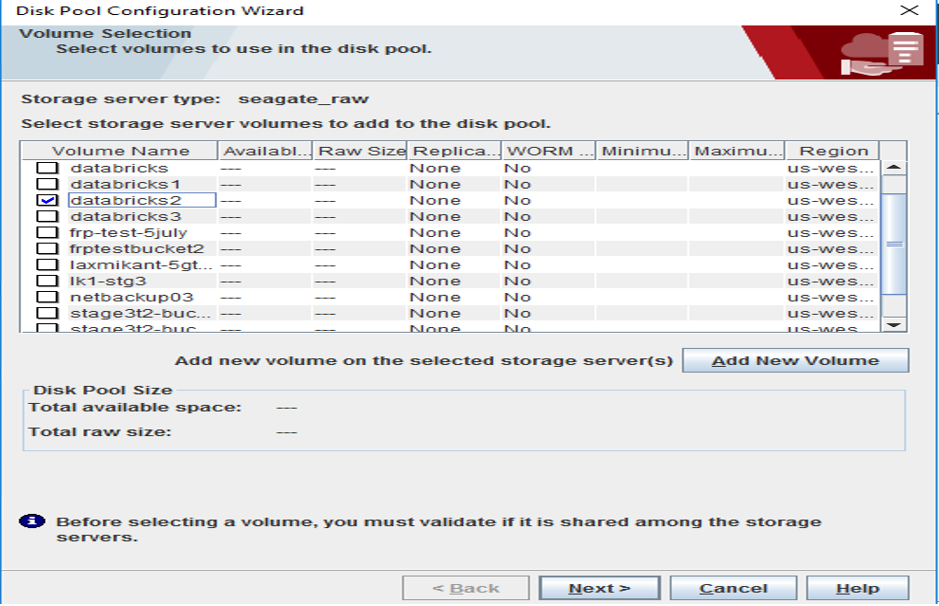
- Provide a disk pool name and leave the remaining fields as the default.

- Verify the disk pool configuration summary and select Next to continue.
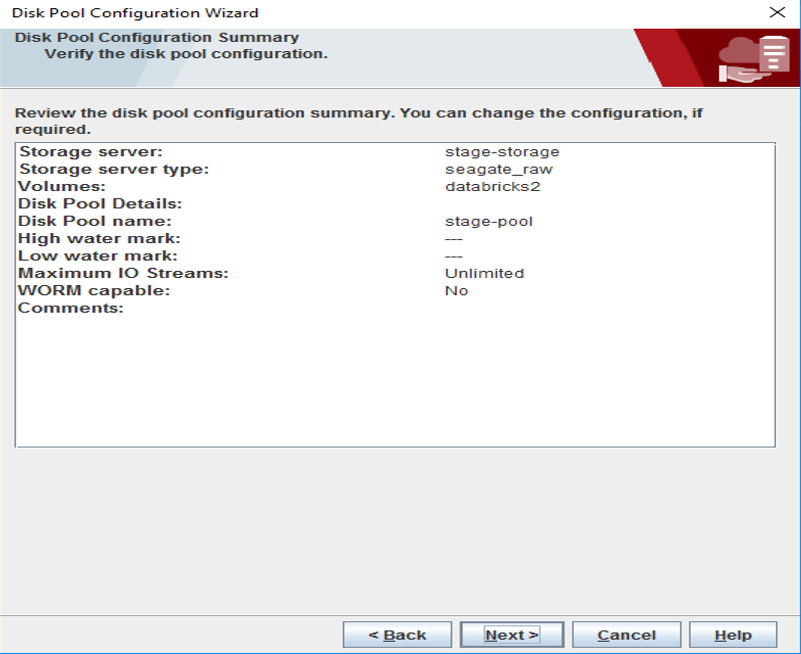
- You will receive a message confirming the creation of your disk pool. Select Next to continue.

Create storage units
- Create a storage unit for your disk pool and select Next to continue.
- Enter the name.
- Choose Only use the selected media servers.
- Set the Maximum concurrent jobs and Maximum fragment size.

- Select Finish to complete the disk pool configuration wizard.

Create a policy
To create a policy:
- Open the Policies page, right-click on your media server and select New Policy.

- Create a Policy name and select OK.

- The following window will appear. Choose the Policy storage from the dropdown menu and select OK to proceed to the Schedules section.

- Select Add to add a schedule and enter the following fields per your requirements.

Select OK to proceed to the Clients section.
- Select New to create a client. Enter a client name and select the operating system for your backups.

Select OK. Once your client is added, the new client is displayed.
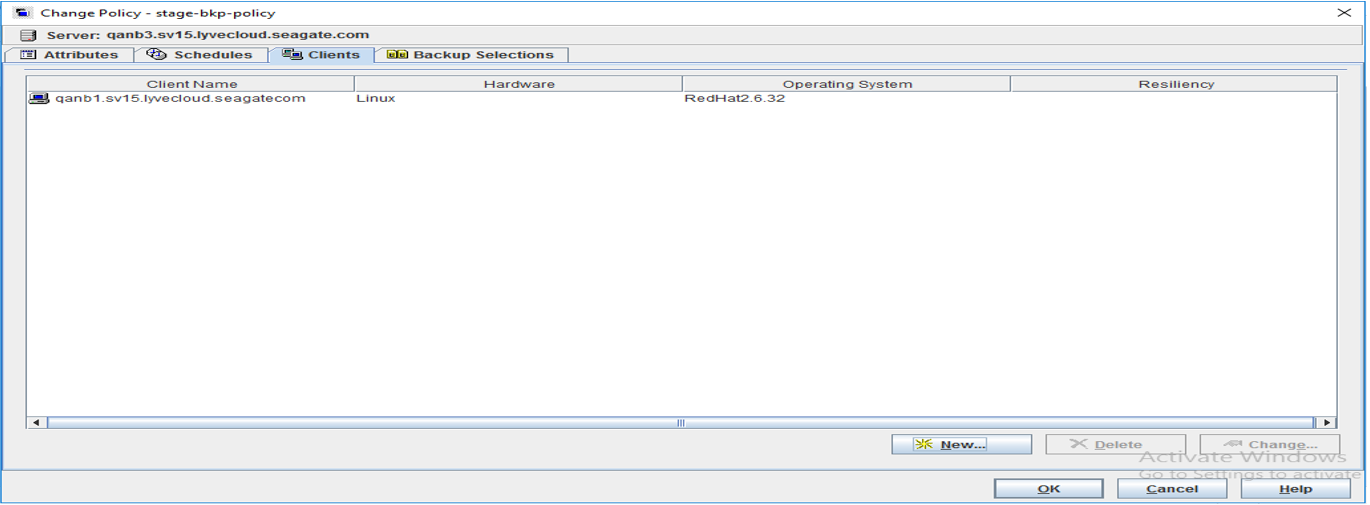
- From the Backup Selections page, select Browse. It lists all folders present on the client.

- Select the folders to backup from the list.

Select OK.
Run manual backups
To run backups manually:
- Navigate to the Policies page, right-click on the new policy created and select Manual Backup.
In our example, we created the policy stg-backup-policy.

- You will find the backup policy, schedule, and client machine of your manual backup. Select OK to begin the manual backup.

Monitoring and viewing Jobs
- Select Activity Monitor to view backup logs by associated Job Id.

- Double-click on a Job Id to view detailed logs of the backup. Select Detailed Status to view the status logs of the backup.

- Once the backup is completed, verify that the content has been copied to your bucket.
/usr/openv/volmgr/bin/tpconfig -add -storage_server storage-west -stype seagate_raw -sts_user_id ACCESS_KEY -password SECRET_KEY
For more installation and configuration support with Veritas NetBackup, please visit veritas.com/support.021