此内容对您有帮助吗?
如何使本文更有帮助?
Quick Start Guide
Seagate on Vimeo: Lyve Cloud - Getting Started with Lyve Cloud
Understanding Account ID
Account ID is a unique identification that is associated with the Lyve Cloud account. An account ID is unique across all Lyve Cloud accounts globally and can include your company name, which is created during the onboarding process. The account ID helps to identify and distinguish resources in one account from the resources in another account.
While creating, the length of the account ID must be between 3 and 63 characters, where only lowercase characters, numbers, and "-" are allowed.
You cannot change the account ID once it is created.
The account ID is used to create the unique URL for the account's console URL with the following format: https://<account_ID>.console.lyvecloud.seagate.com
A single URL is used to access the Lyve Cloud console, which is authenticated by the account ID.
Signing in to Lyve Cloud
To use the Lyve Cloud console, you must sign in using your account credentials. To sign in to Lyve Cloud, you will need a login URL, which contains a unique account ID. The account ID can include your company name chosen during onboarding. You cannot change the account ID once it is created. The account ID is unique across Lyve Cloud accounts.
A single URL is used to access Lyve Cloud console which is authenticated by the account ID, and the URL has the following format: https://<account_ID>.console.lyvecloud.seagate.com.
If you know the Lyve Cloud account login URL
After successful onboarding, you will receive a welcome email. This email contains the Lyve Cloud URL. Using this URL, you can sign in to Lyve Cloud by creating a password.
This URL is in the following format: https://<account_ID>.console.lyvecloud.seagate.com. The user can bookmark or save this URL to log into the console.
If you do not know the Lyve Cloud account login URL
If you have not saved the URL: https://<account_ID>.console.lyvecloud.seagate.com you will not be able to login to Lyve Cloud console. But when you try to log in using the URL https://console.lyvecloud.seagate.com, you are directed to enter the Lyve Cloud Account ID to access the console.
Login Sequence
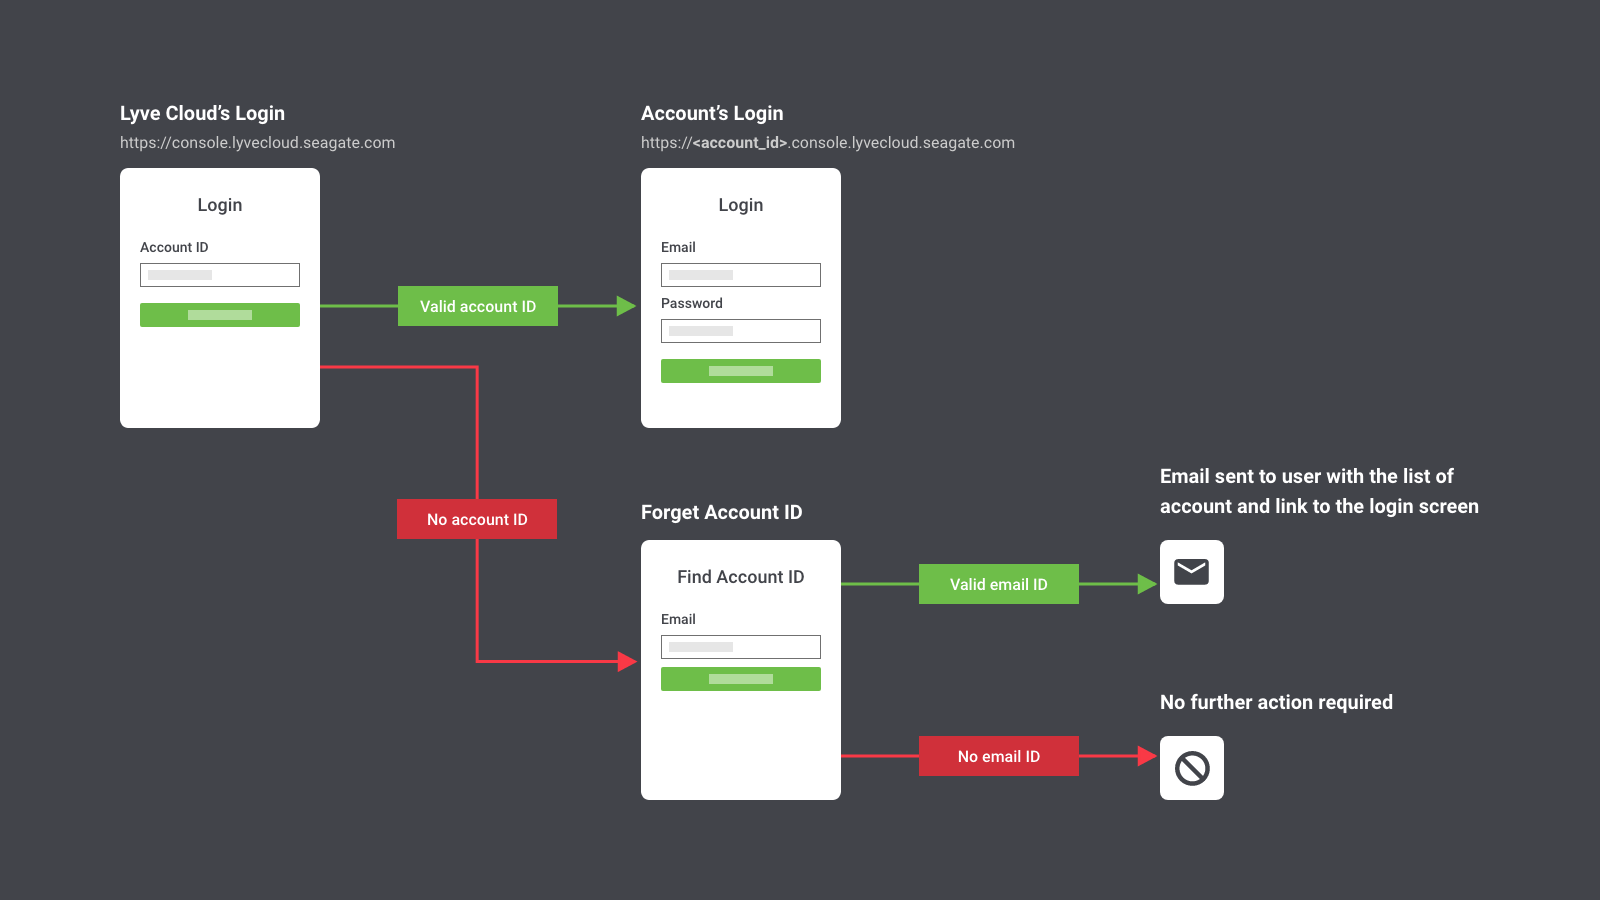
You have an Account ID—Enter the Account ID on the login page, followed by the registered email address. An email with all the details of the Lyve Cloud account is sent, which contains the Lyve Cloud URL to log in.
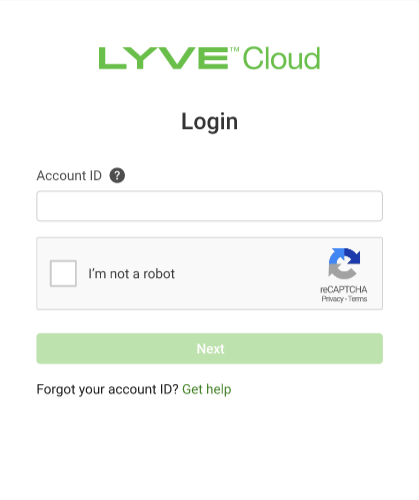
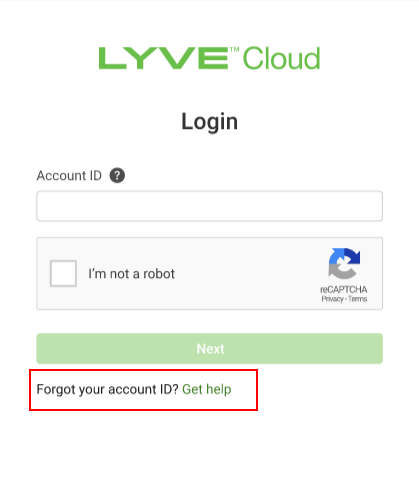
You do not have an Account ID—You will receive your account ID by providing your registered email address. You must select Get Help on the Login page. You are directed to enter your email address.
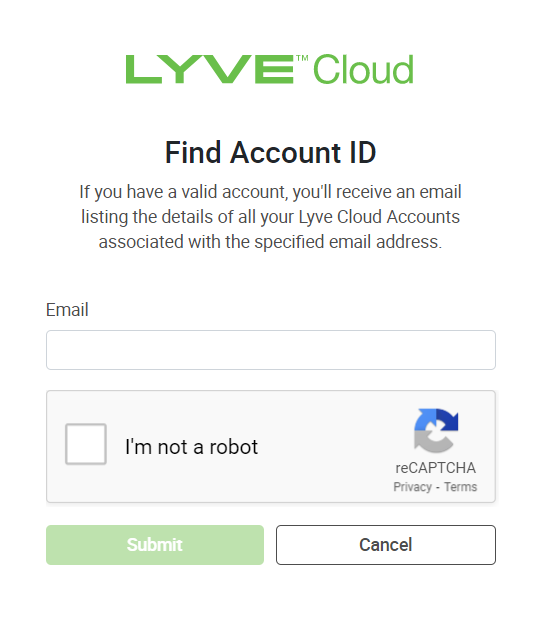
If the email address is not registered with Lyve Cloud, contact the support team at support.lyvecloud@seagate.com.
Finding your Account ID in the Lyve Cloud console
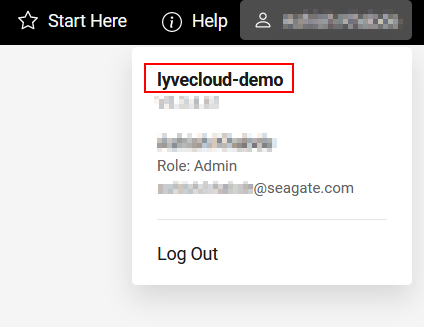
If you have already signed in to the Lyve Cloud account, you can view the Account ID from the Header pane. Select the username in the top right to view the Account ID.
The following image highlights the Account ID in the console.
Using the Lyve Cloud console
The Lyve Cloud console includes three panes: the header pane, left menu, and main view.
The following image displays the three panes of the Lyve Cloud console.
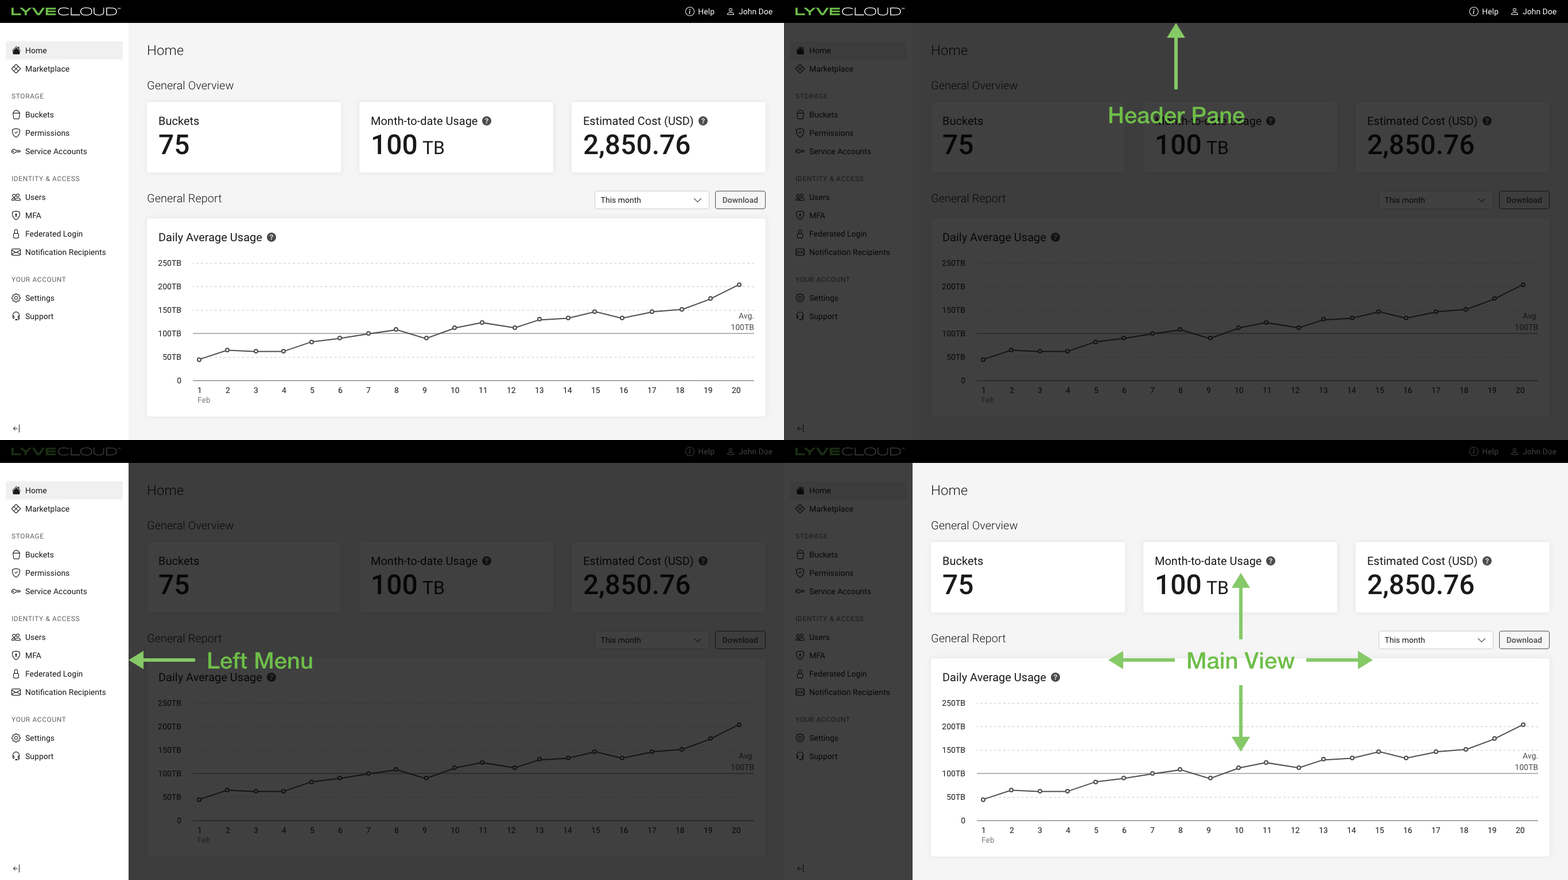
Header pane: Select the Lyve Cloud logo to return to the dashboard. The Start Here button, Help link, user name, and icon are displayed on the top right corner of the header pane. Open the Start Here window to find quickstart resources. View our documentation and training videos under Help. To exit Lyve Cloud, select the user name and then select Logout.
Left menu: The left menu is organized as follows:
Home page: It is the landing page after you login to the console. It shows the number of buckets, reports, and usage and more. For more information, see Understanding the home page dashboard below.
Marketplace: This section displays and provides more information on partner solutions like Backup and Recovery, Surveillance, Compute, etc. that are certified with Lyve Cloud.
STORAGE
Buckets: Allows you to create and manage buckets.
Permissions: Allows you to set the permissions for buckets.
Service Accounts: Generates access credentials that enable S3 applications to perform S3 operations on the bucket.
IDENTITY & ACCESS
Users: Allows you to create users and set user roles.
MFA: Allows you to add an additional factor to the login to prevent unauthorized access.
Federated Login: Allows you to enable federated single sign-on (SSO) from your organization's Identity Provider (IdP).
Notification Recipients: Allows you to add recipients to receive service and other important Lyve Cloud notifications via email.
SETTINGS
Settings: Allows you to enable and disable audit logs. These logs are detailed records of activities in the Lyve Cloud console and S3 API operations.
Billing: Allows you to see each months' costs, and download and view previous monthly invoices.
Support: Allows you to open new support tickets for any issues related to Lyve Cloud services.
Main view: Displays the information corresponding to the left menu item selected.
Understanding the home page dashboard
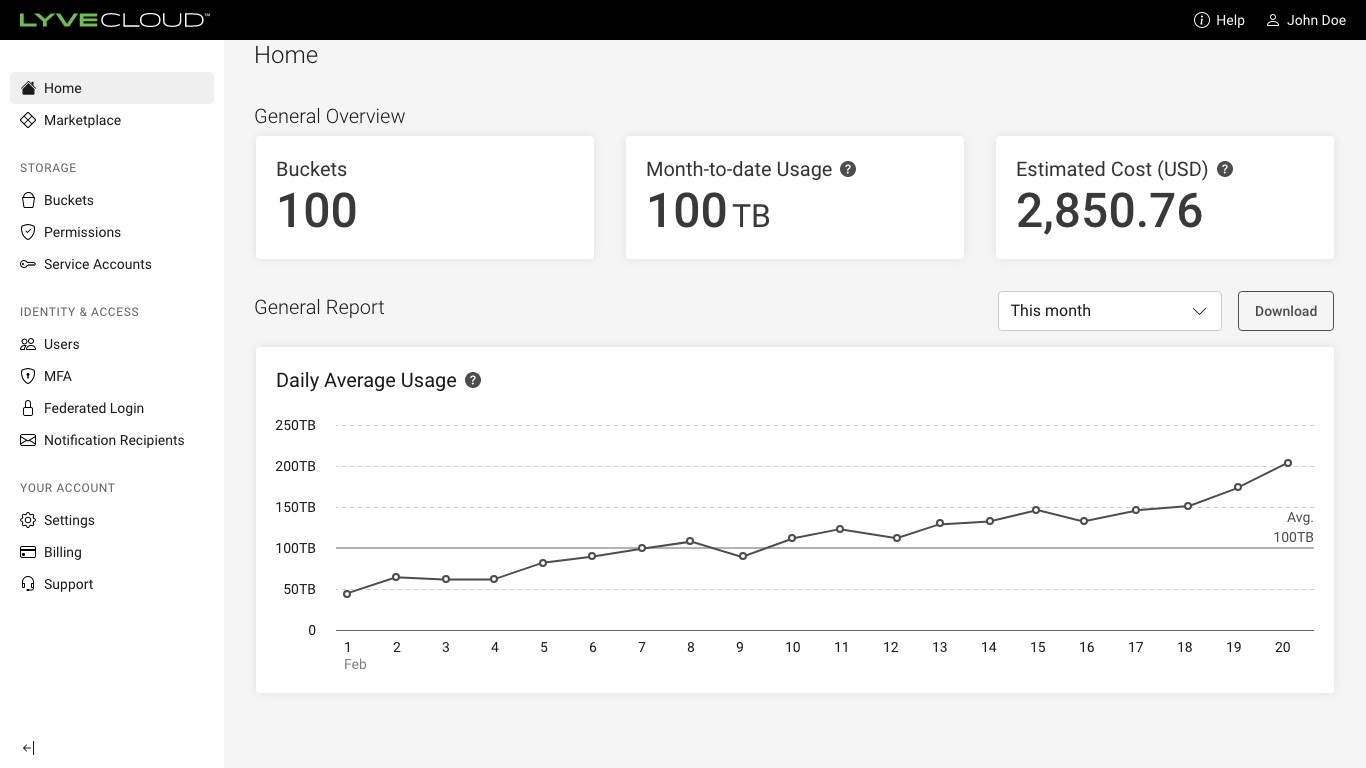
After you log in to the Lyve Cloud console, you are taken to the dashboard's home page, and the headings on the page are displayed without data. However, if you have created buckets and are storing data in the buckets, the dashboard displays important details in the different sections.
The dashboard displays statistics of the storage system, usage, and estimated cost. A graphical view of usage trends, bucket count, and average usage are available.
Home page |
Master Account home page |
 |
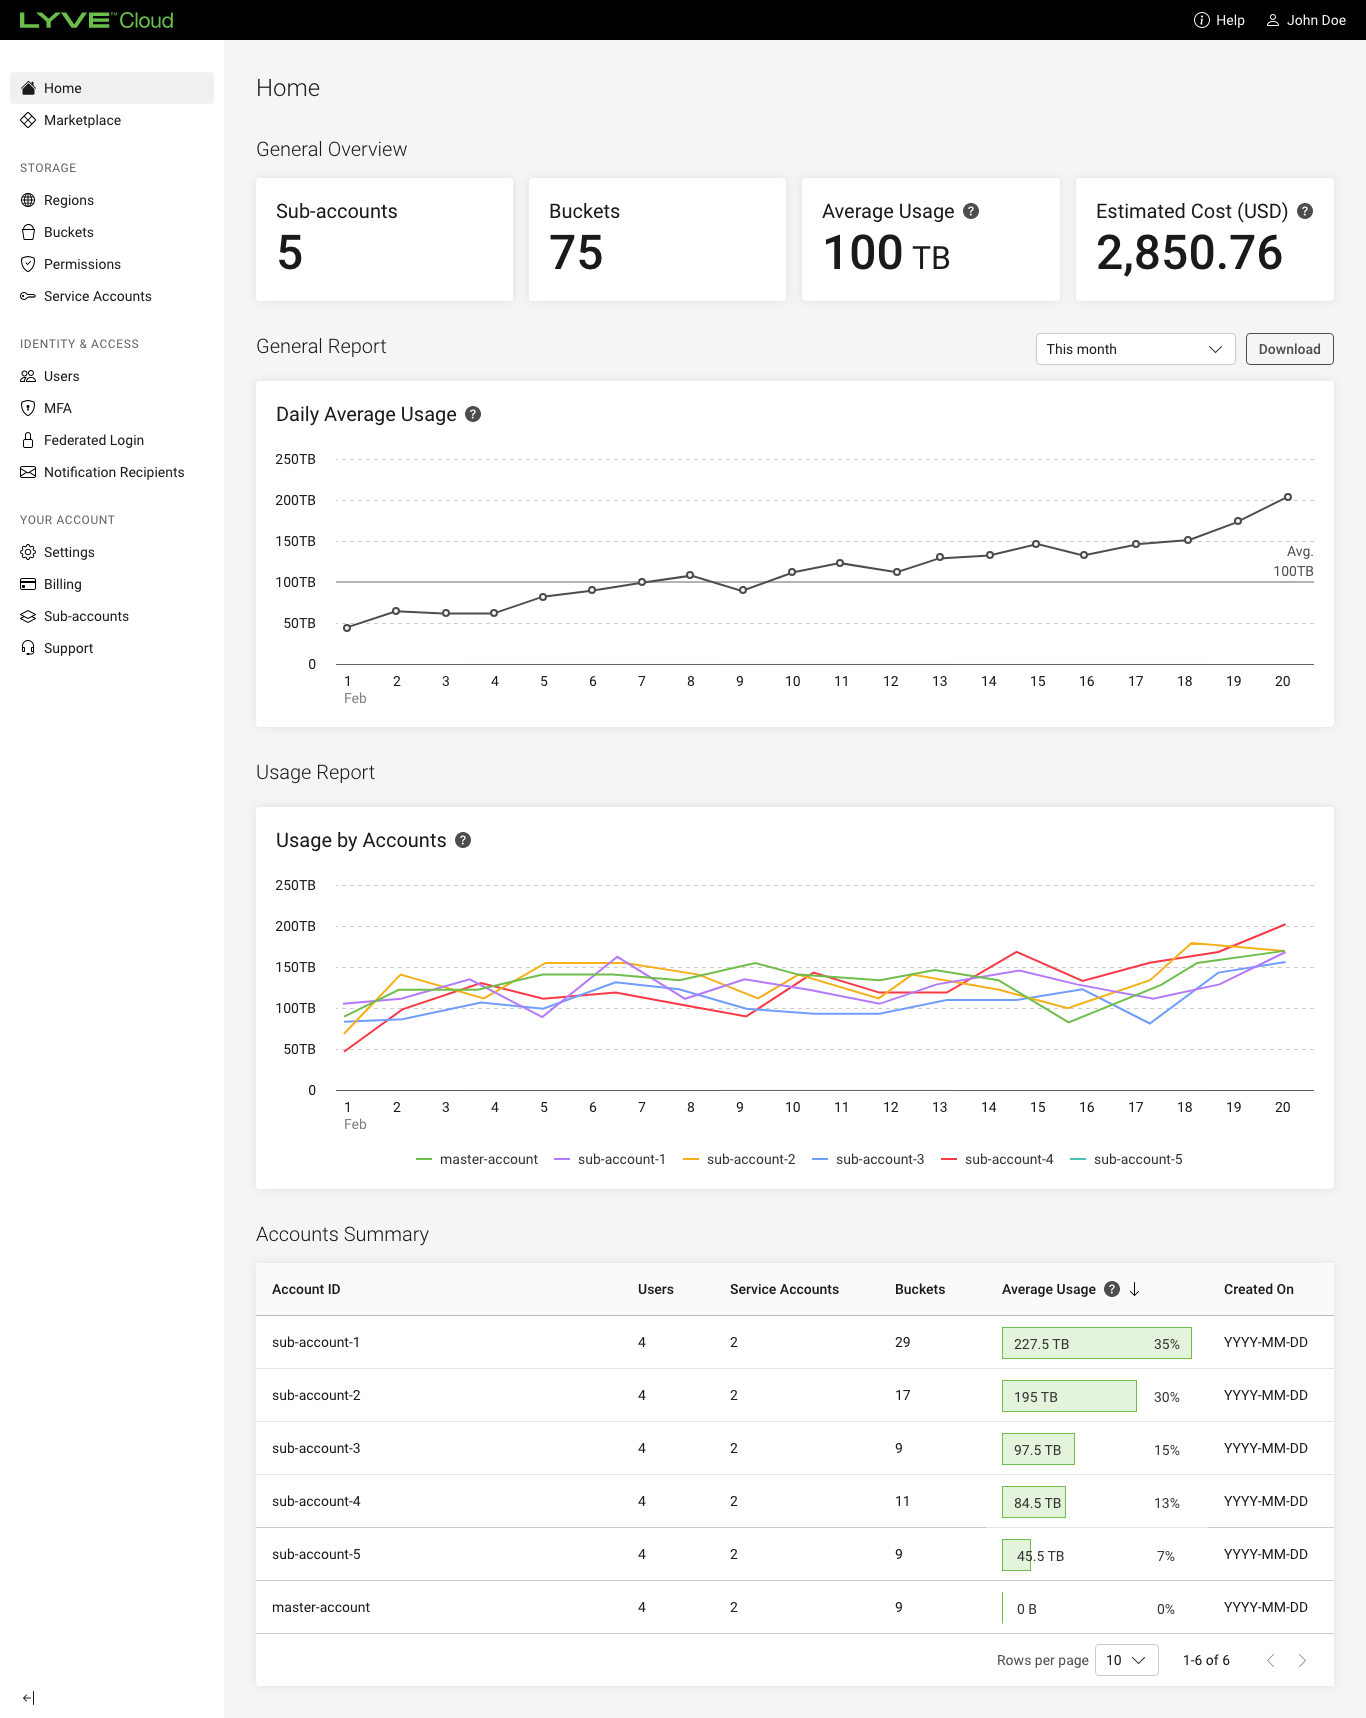 |
Buckets: Displays the total number of buckets.
Month-to-Date Usage: Displays the average usage of the account from the beginning of the month until the current date.
Estimated Cost: Displays the estimated monthly storage costs based on the current month’s usage trends. This cost is displayed in US dollars.
General Reports:
Daily Average Usage: Displays the daily average from a series of four usage snapshots within a 24-hour period of data stored in all the buckets.
Date range selection: Select a current month, last six months, or custom time range to view usage trends.
This month is a default selection that displays the daily average usage trend for the current month to date.
Selecting the Last 6 months shows the usage trend of the last six months. Each data point displays the monthly average for that month.
Selecting a Custom time range allows you to choose the monthly time range, and the data points display the monthly average usage.
Download the usage data in CSV format by selecting Download. Use the Date range selection to select the length of time of the report. This report shows the Date, Region Name, Bucket Name, Usage(byte), Usage (GB) in the excel sheet.
Usage Report: Displays the usage of all the sub-accounts in the master account. The Sub-accounts Usage graph displays the usage of each sub-account on the same graph. The graph has different colour lines per account. Hovering over a particular day/month (depending on view scale) displays a tooltip with the time information for all selected accounts with the line colour, account name, and usage value per sub-account account.
Accounts Summary: Displays the summary of each sub-account.
Customers: Lists the account ID of each sub-account in the master account.
Users: Lists the number of users for each sub-account.
Service Accounts: Lists the number of service accounts for each sub-account.
Buckets: Lists the number of buckets created by each sub-account.
Average Usage: Lists the average amount of data used per day for each sub-account, from the beginning of the month to the current date.
Created On: Displays the date when the sub-account is added to the Lyve Cloud master account.
Provisioning storage buckets
Seagate on Vimeo: Lyve Cloud - How to Create a Bucket
Create buckets
Begin by creating a bucket to add data.
- On the left-hand menu, select Buckets, and then select Create Bucket.
- Enter the Bucket Name and Region. Select Create. (Optionally, enabe Object Immutability.)
After the bucket is created, it is listed on the Buckets page. For more information, see Administrator's Guide - Bucket Management.
Create bucket permissions
Next, create and apply permissions to at least one bucket. Permissions define the type of operations that applications perform on the bucket: Read, Write, or All Operations (read, write, delete, and list).
- On the left-hand menu, select Permissions, and then select Create Bucket Permission.
- On the Create Bucket Permission dialog:
- Name: Enter the name for permission. Permission names can contain any alphanumeric characters, dashes (“-“), underscores (“_”), or spaces.
- Select one of the following from Which buckets does this permission apply to?
- One or more existing buckets
- All buckets in this account with a prefix
- All buckets in this account
- Select Actions to assign privileges as All Operations, Read only, Write only.
- Select Create to save the permission for the bucket.
- Alternatively, you may import policy permission files to create new permissions. See Using policy permission files.
For more information on buckets, see Administrator's Guide - Bucket Management.
Create service accounts
Finally, after creating permissions for a bucket, create a service account to allow applications to authenticate and use these permissions. Applications use service account credentials in API calls to access buckets to add and delete data.
- On the left-hand menu, select Service Accounts, and then select Create Service Account.
- Enter the Service Account Name, and then select applicable Permissions from the available list.
- Select Create. A confirmation displays the access key and secret key required to access the bucket.
- Copy these account credentials or download them in CSV or JSON format before you close the dialog.
For more information on service accounts, see Administrator's Guide - Account Management.
Understanding Global Accounts
Lyve Cloud Global Accounts let customers create buckets in different regions for increased provisioning and data access. For more information, see Creating buckets .
Once you create buckets in different global accounts:
- The Lyve Cloud console lists all the buckets created for an account. For more information, see Listing buckets.
- Listing buckets using the S3 API displays the buckets for the region that is specified in the API command.
- You can copy objects between different Lyve Cloud regions using S3 API commands.
To access data from buckets created in different global regions:
- Make direct requests to one of the Lyve Cloud S3 API endpoints. For more information on S3 access points, see S3 API endpoints.